Watch the Video
Creating Your First Users
Once you have one or more entities, you can start creating users.
To do this, click on Menu, then Administration. This will take you to the Administration menu. In the left column, click on User Accounts. This will show you details on all the current users.
In the top right corner, click on the yellow + New user button.
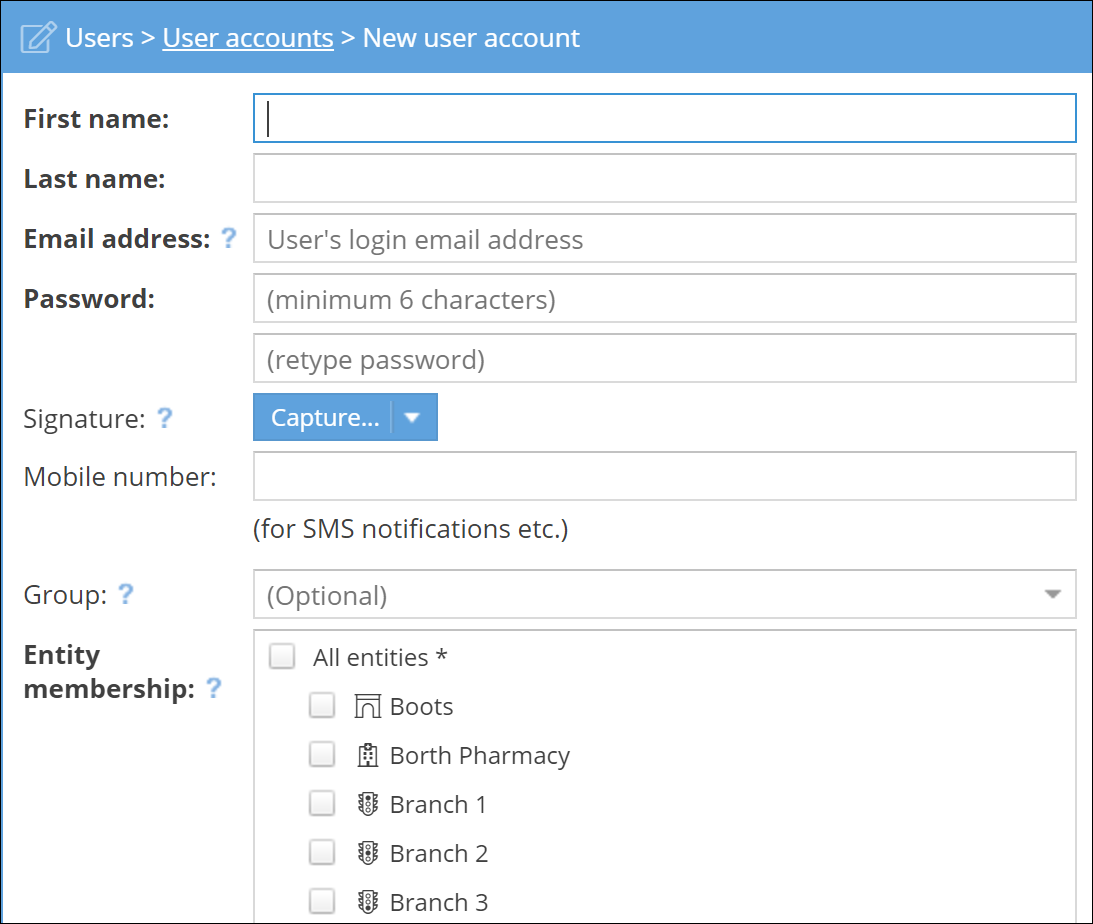
The required fields are in bold text: First name, Last name, Email address, Password, and Entity membership.
Users can be members of one entity, multiple entities, or all entities (including any entities created in the future). Users will only be able to see and interact with information (such as customers and orders) in the same entities they’re a member of. So if your user is a member of Entity A, he’ll only be able to see customers and orders also associated with Entity A.
After selecting the entities, you can also select if you want to enable tracking for the user.
You’ll also need to set the permissions for the user. You can select one of our templates based on common requirements to get you started and adjust them if necessary, or you can set all the permissions manually.
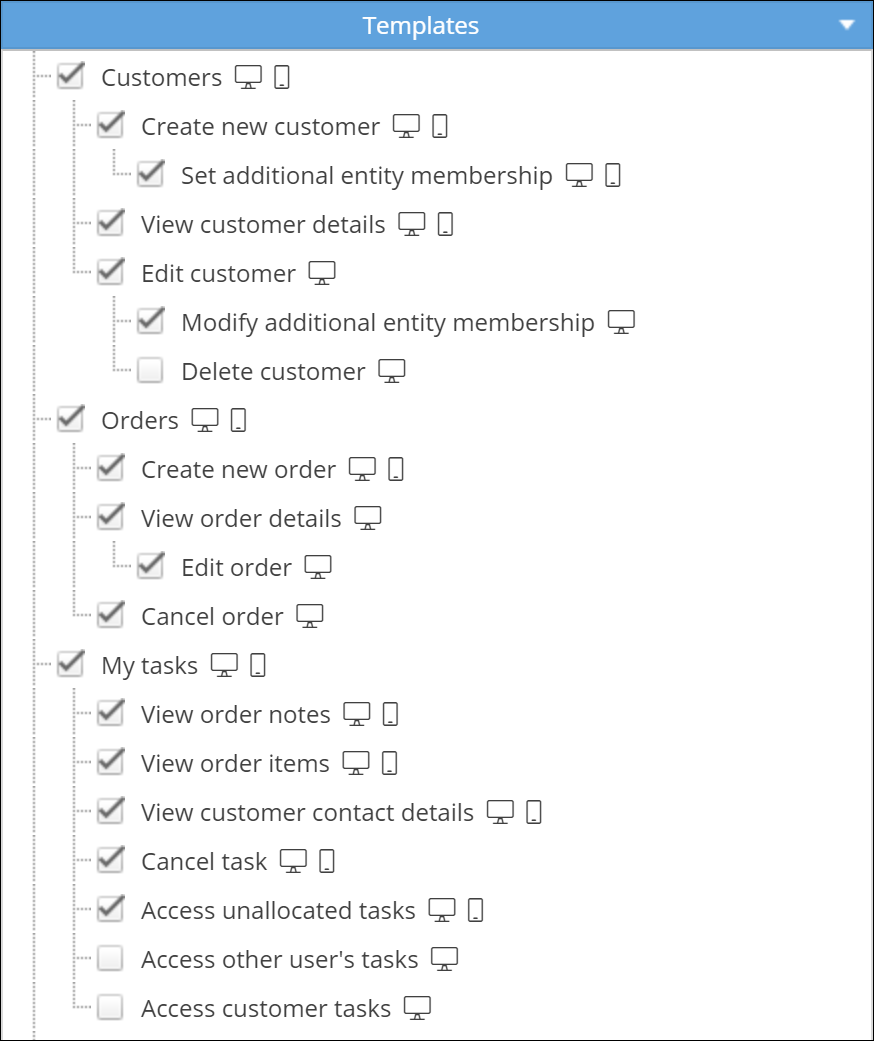
The symbols next to the permission show where it will apply. A computer icon means the permission will affect PDM Web use, and the phone icon means the permission will affect PDM App use.
Currently, we have templates for couriers, general managers, company owners, and system administrators.
We recommend you have at least one system administrator, who can keep an eye on the system and make sure everything’s set up correctly.
Finally, the user will be classed as Active by default. Only active users can be assigned tasks. If you wish to deactivate a user, they'll automatically be logged out of PDM.