Watch the Video
My Routes
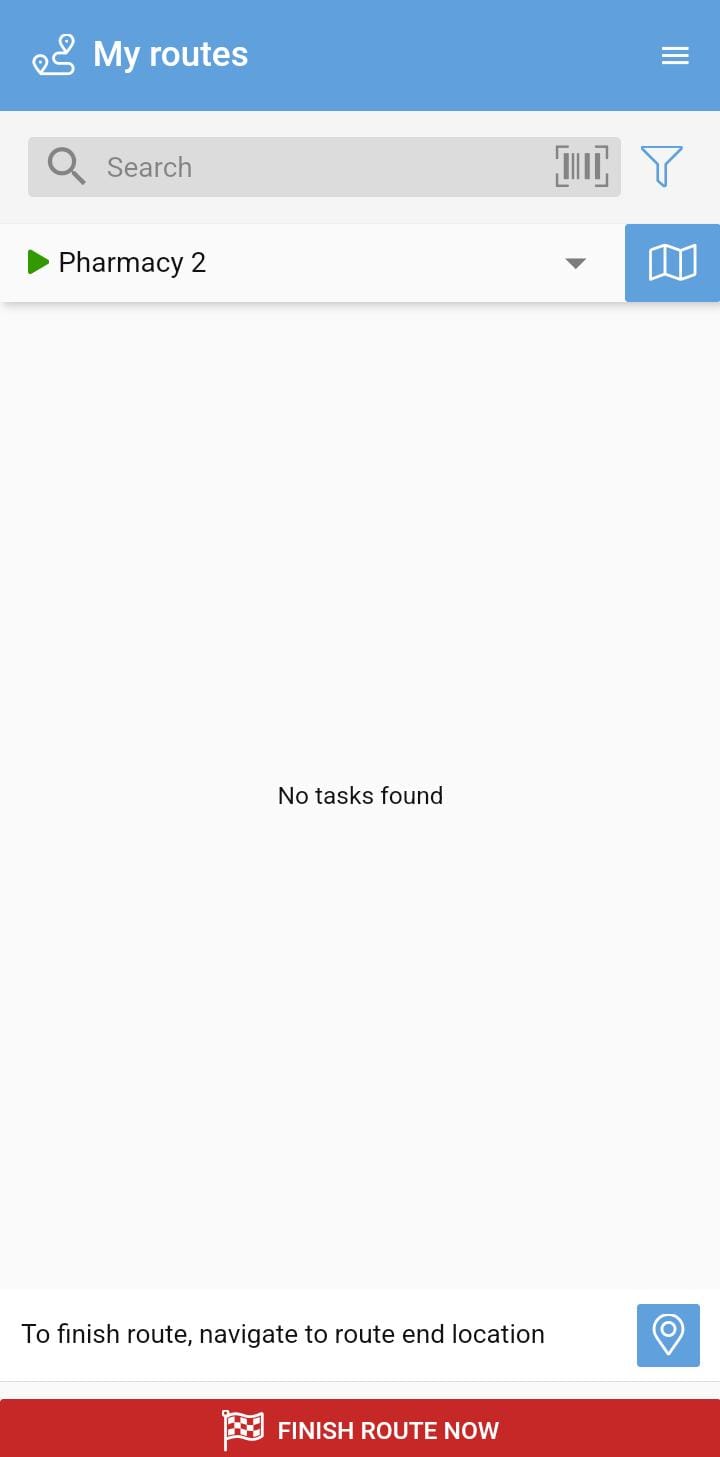
In the My Routes screen, you can see tasks that are on a route assigned to you.
1. Add tasks to route
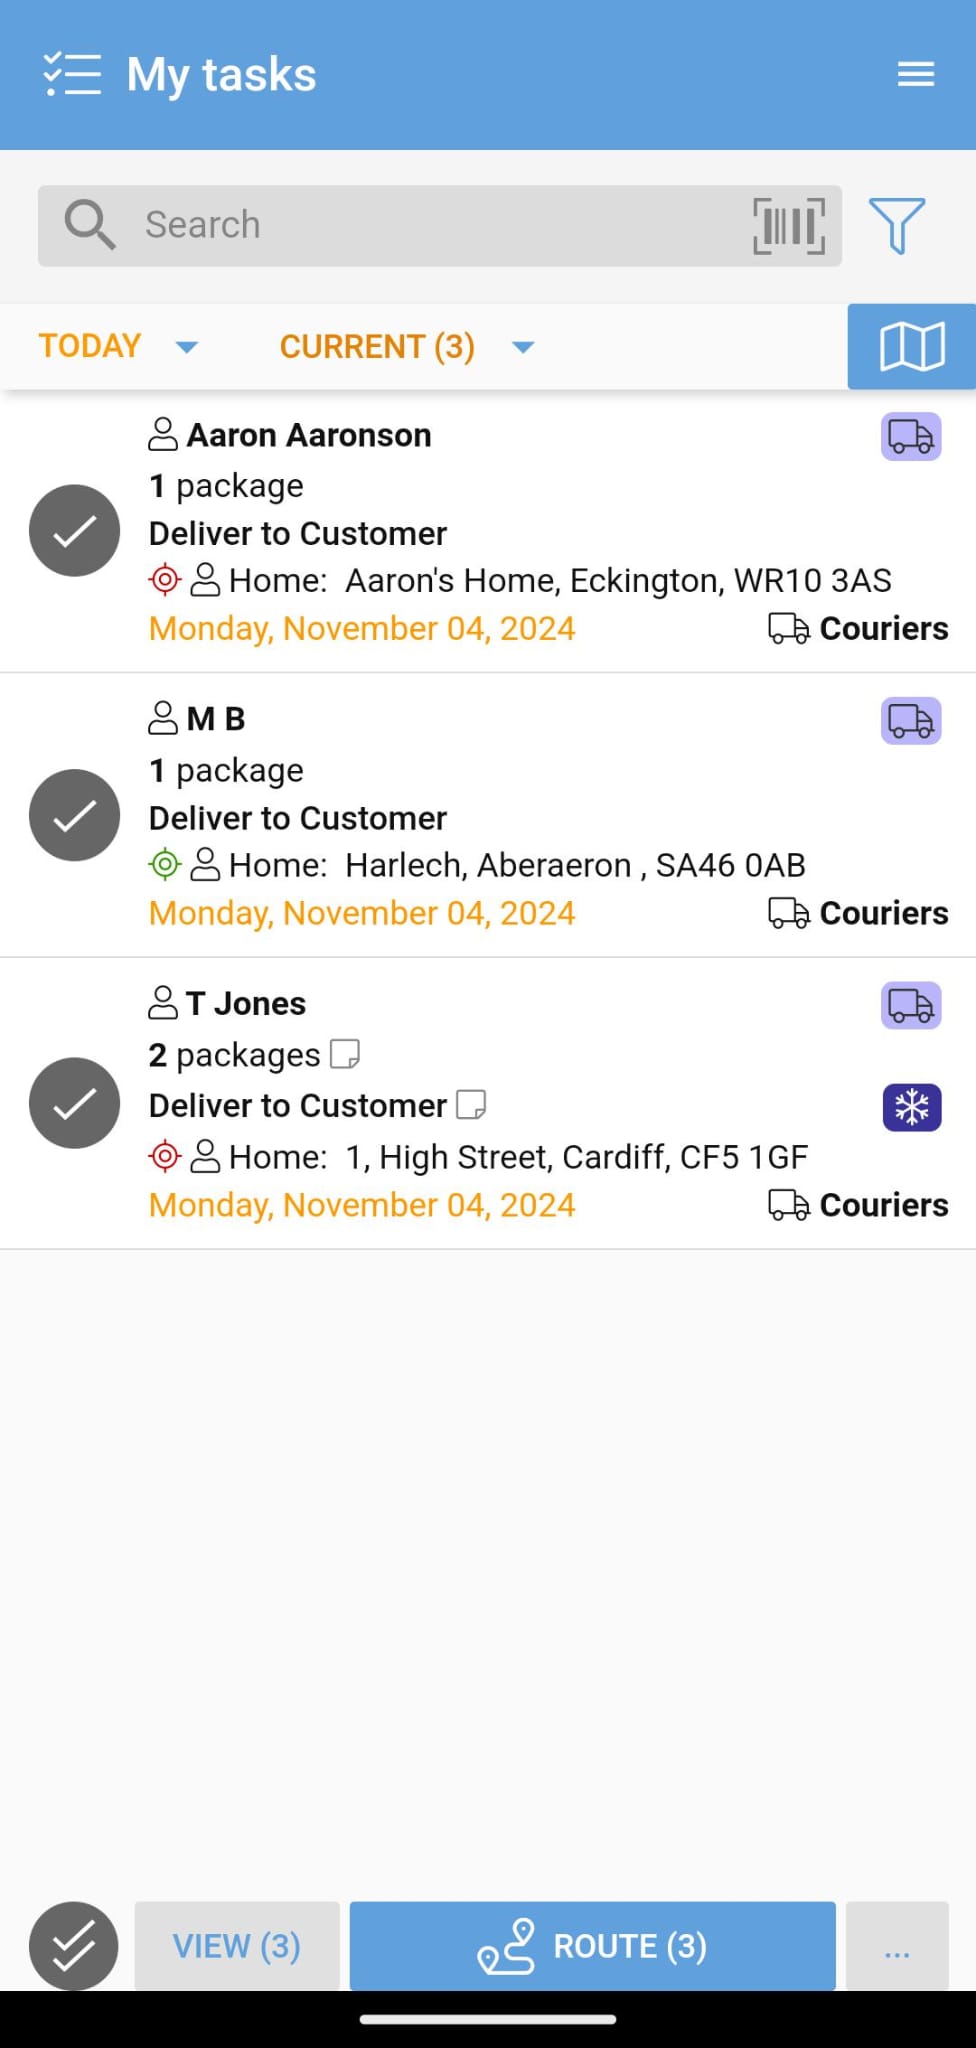
To add tasks to a route, select the tasks in either My Tasks or Unassigned Tasks and tap ROUTE.
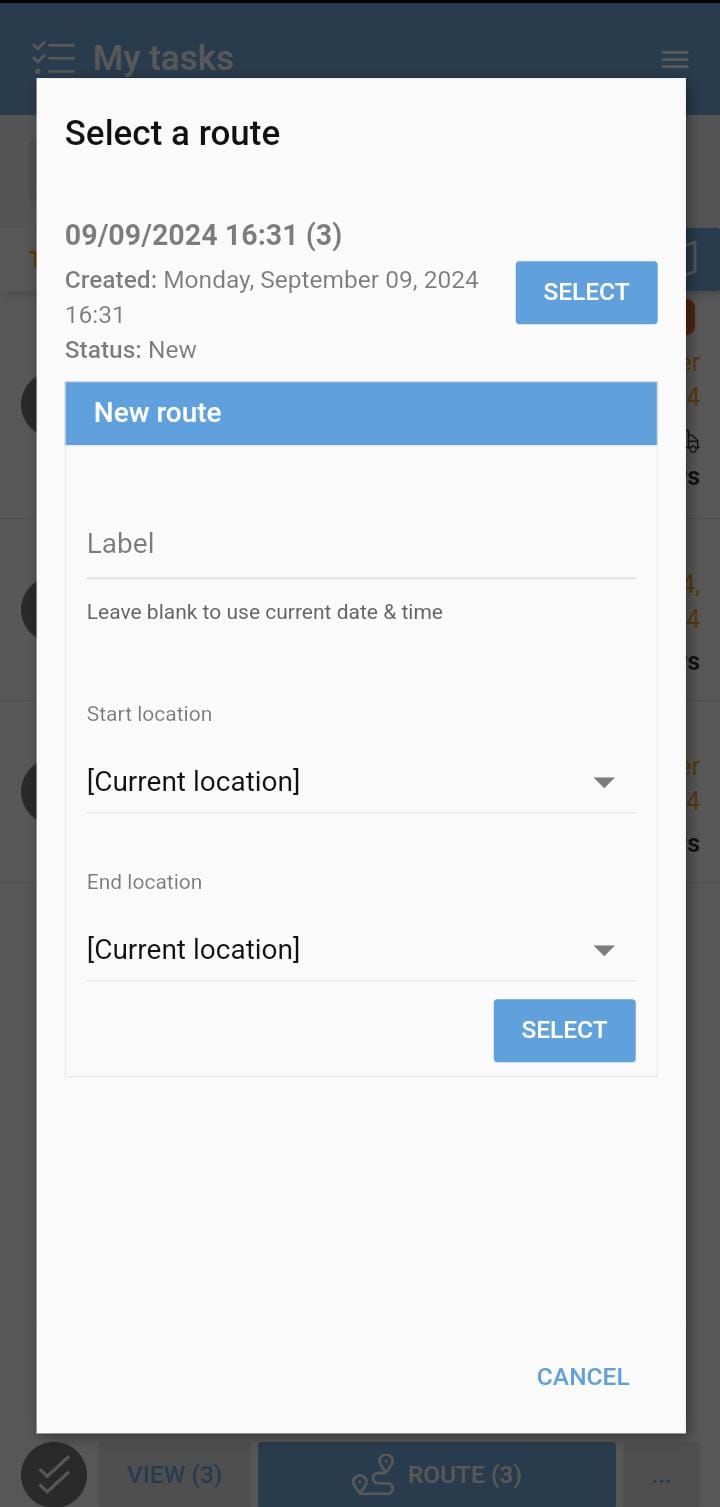
Existing routes can be viewed here; add tasks to an existing route or simply create a new route.
Name the route by typing in the Label field or leave it blank to let the app name the route using the current date & time.
Choose which start and end locations to use and tap Select.
Once tasks are added to the route, any event notifications with an Estimated Time of Arrival (ETA) will be triggered and sent to customers.
2. Go to the My Routes screen
To view the tasks that have been moved from My Tasks and are now added to your route, go to the My Routes screen.
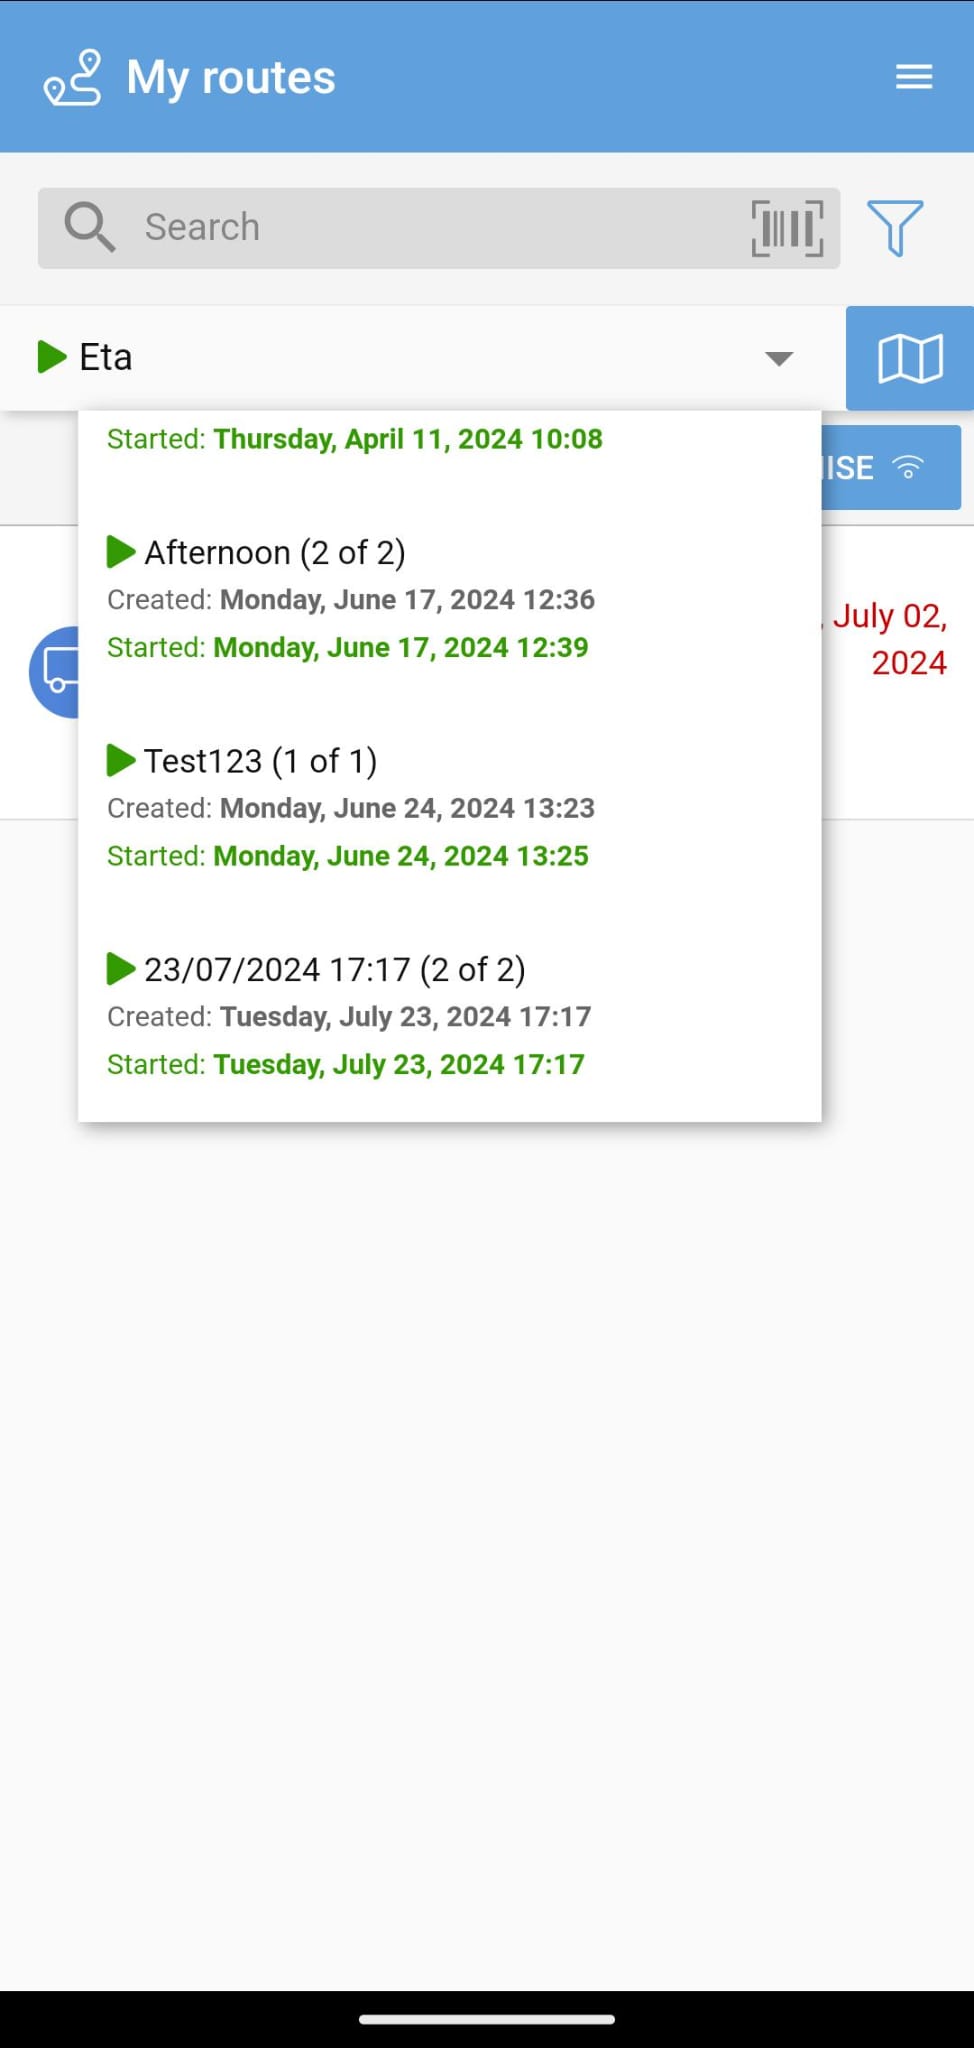
If there is more than one incomplete route, use the drop-down list within My Routes to select a route.
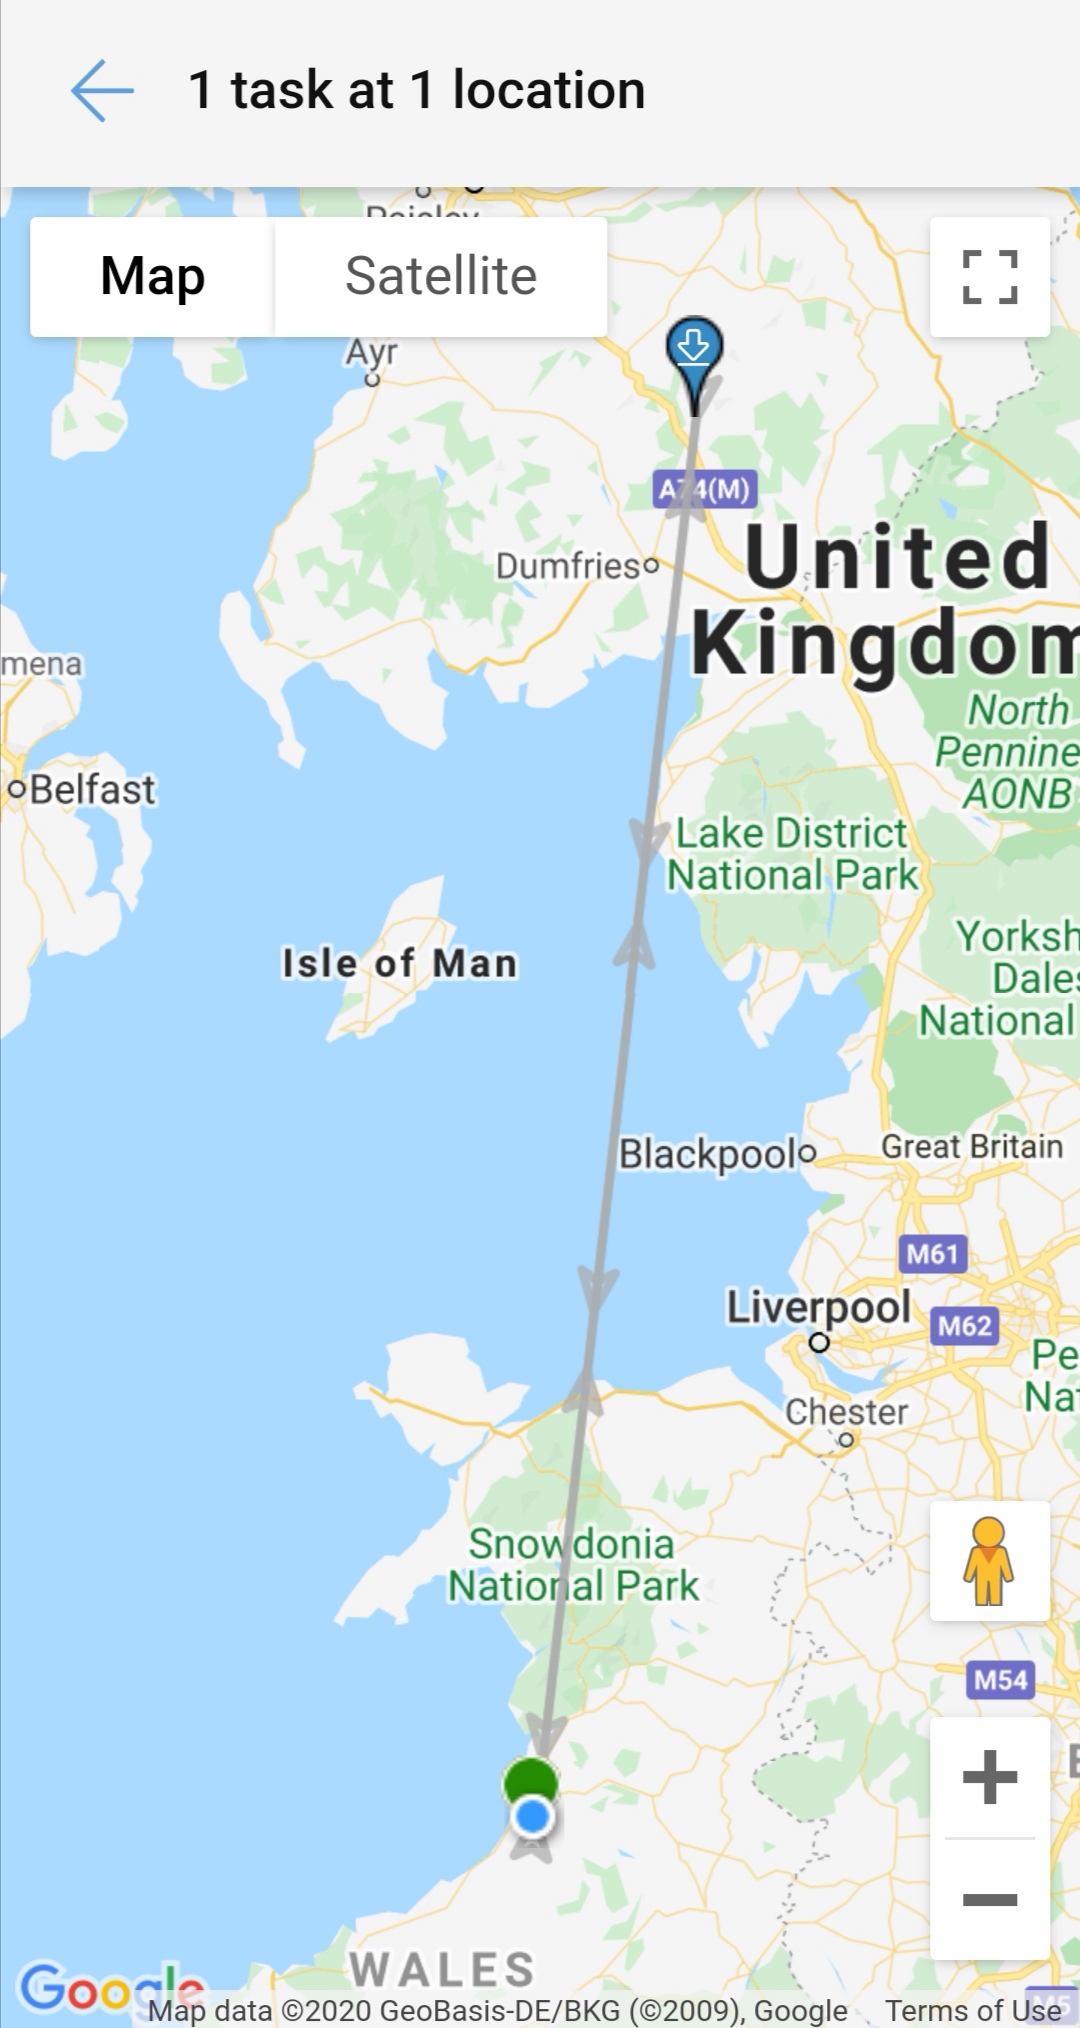
Tap the Map icon ![]() to see the physical locations for the tasks on the selected route.
to see the physical locations for the tasks on the selected route.
PDM App automatically optimises the route to plan the journey.
To manually re-optimise tap OPTIMISE.
Confirm the travel mode and whether you want to avoid tolls or highways.
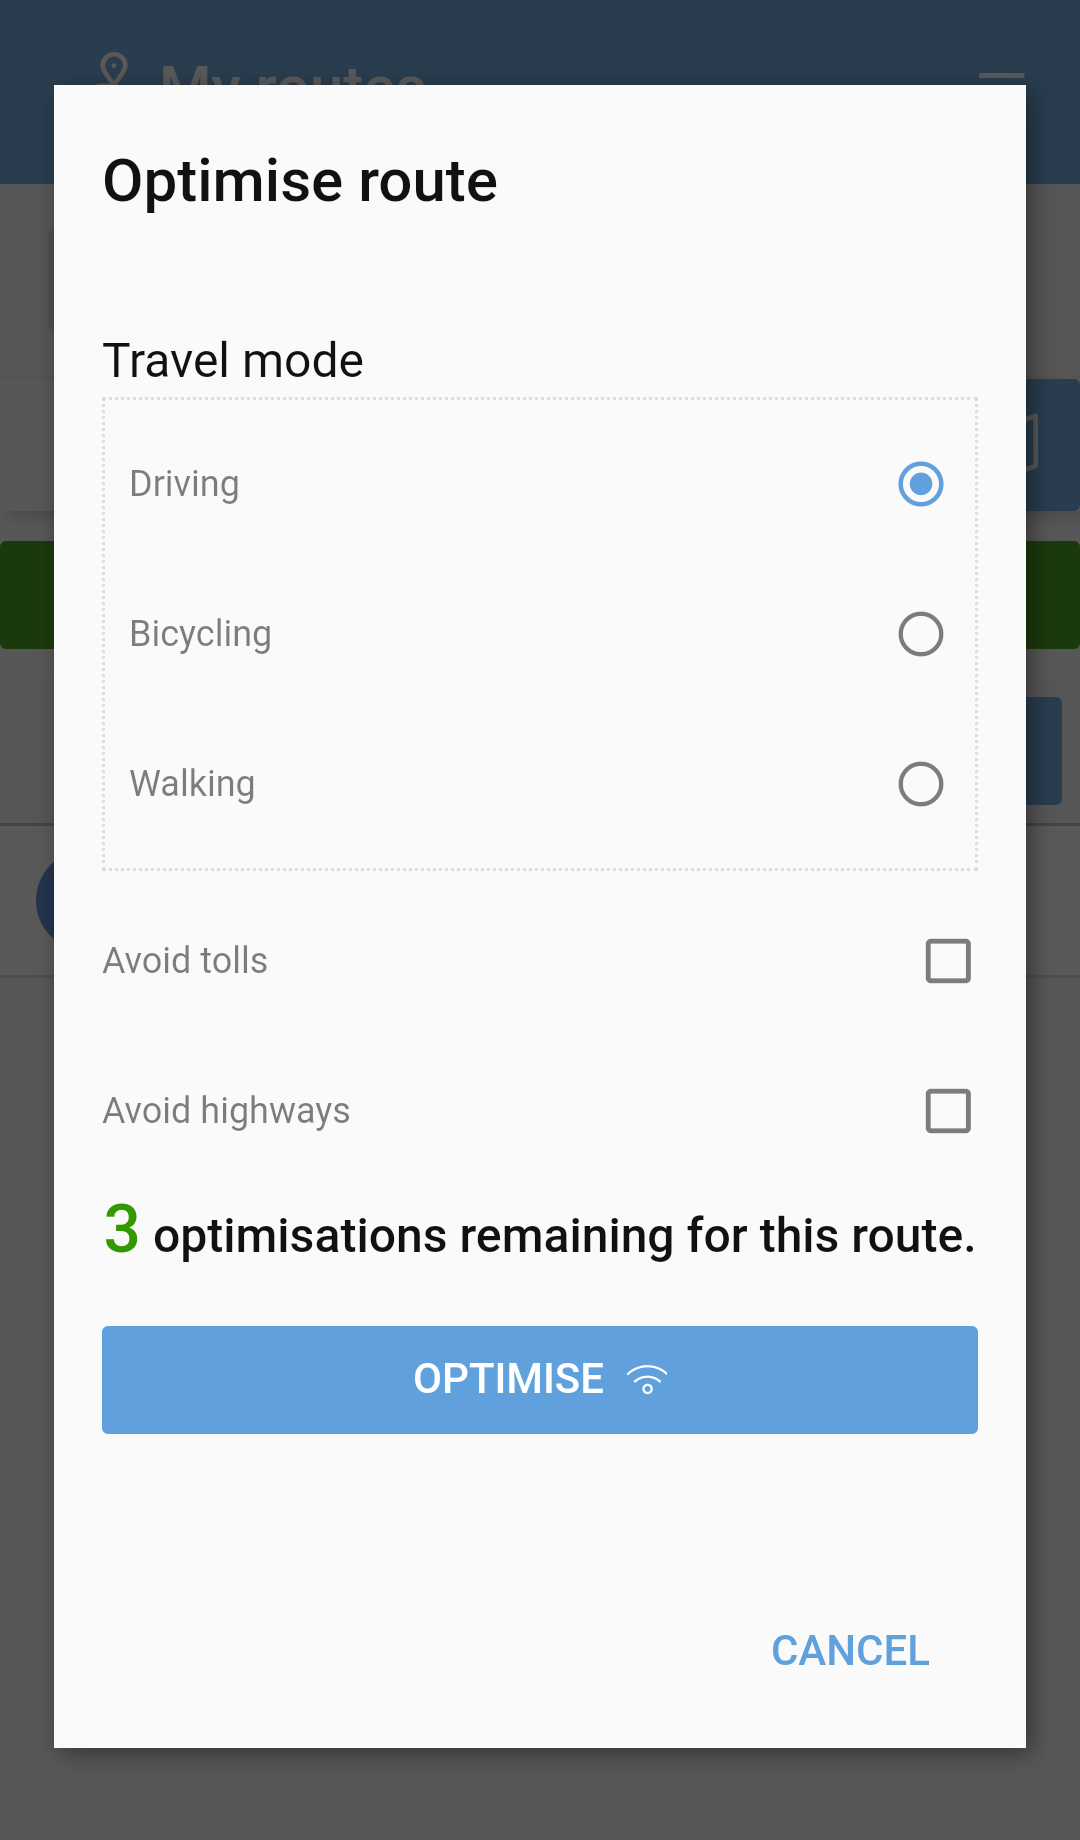
Tap OPTIMISE.
The task list is updated to place the tasks in the order that follows the optimised route.
Now that the route is optimised, let’s take a look and see what the route looks.
Tap the Map icon ![]() again to preview the route.
again to preview the route.
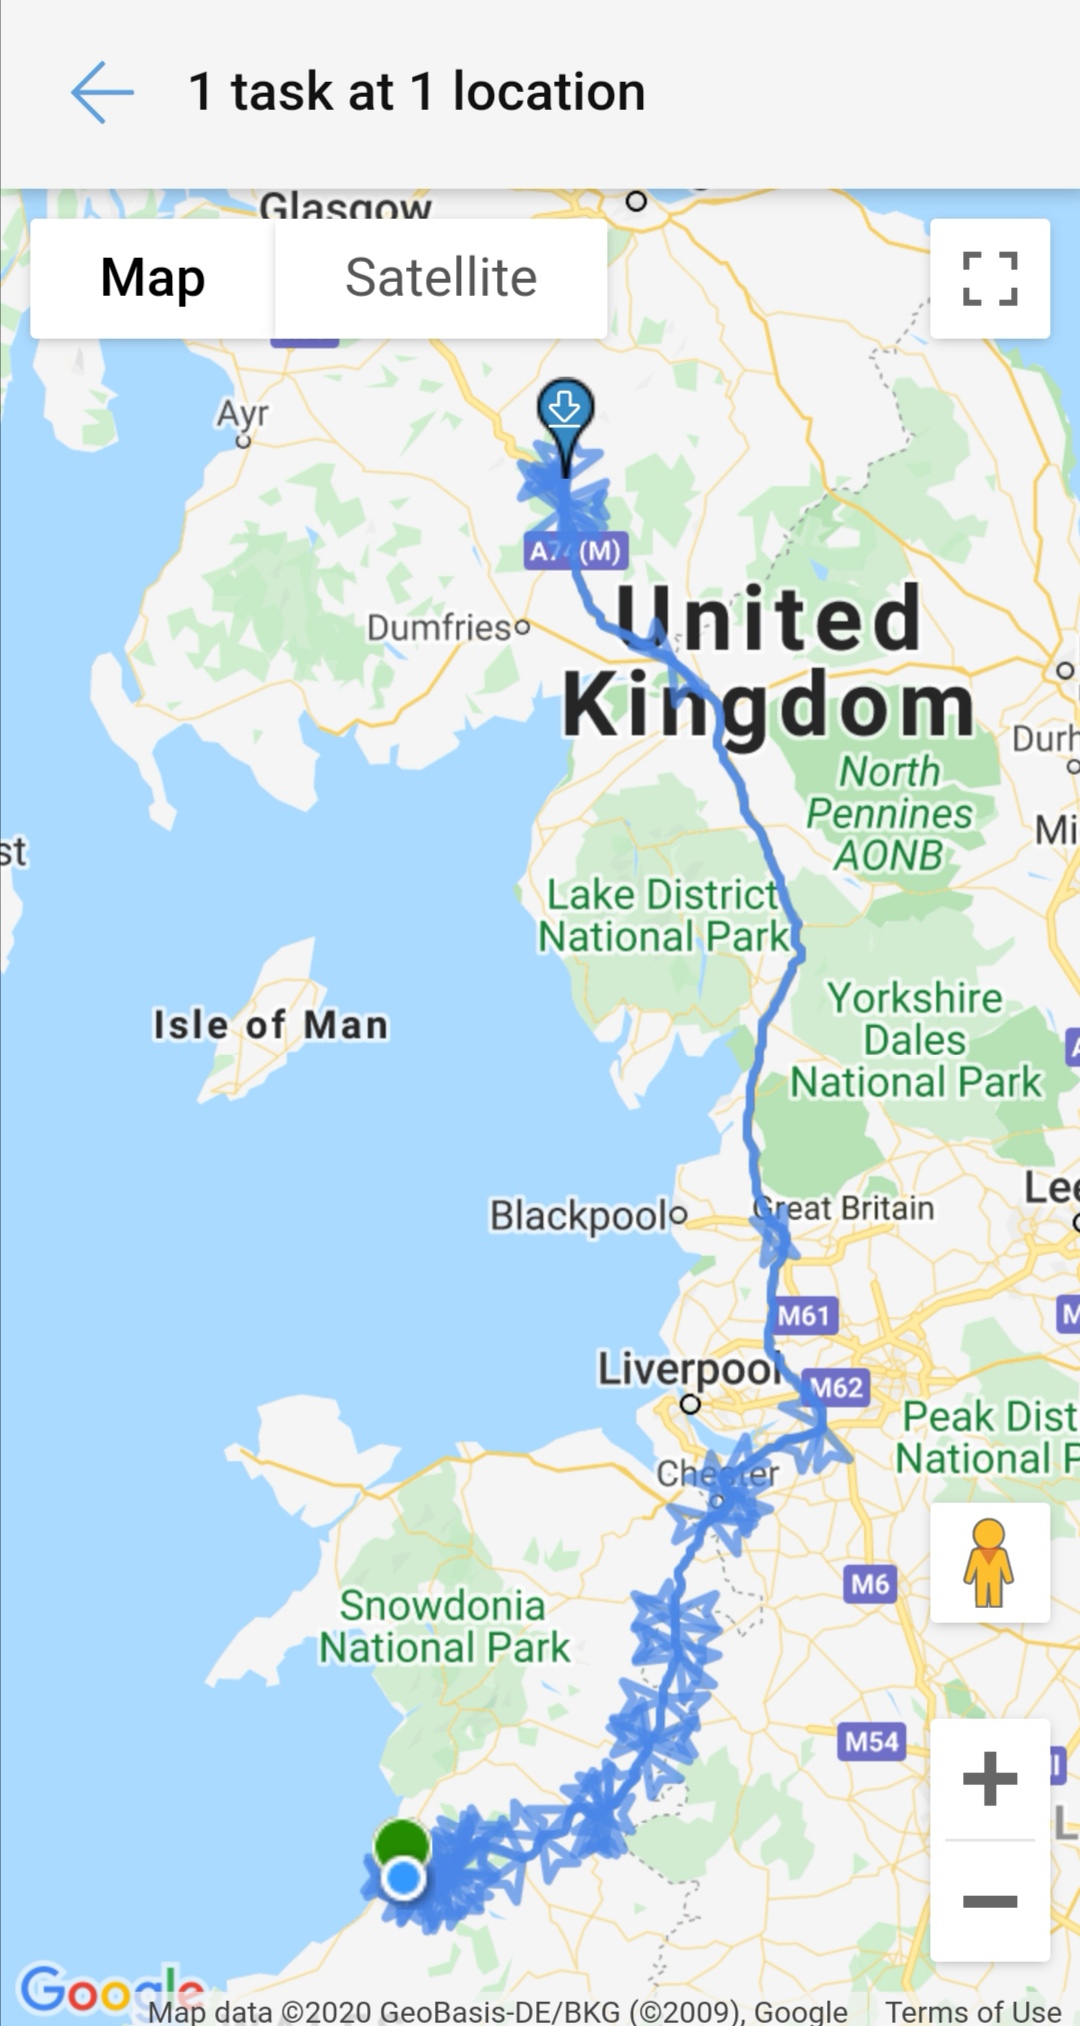
The app will automatically work out the optimal route for carrying out your tasks.
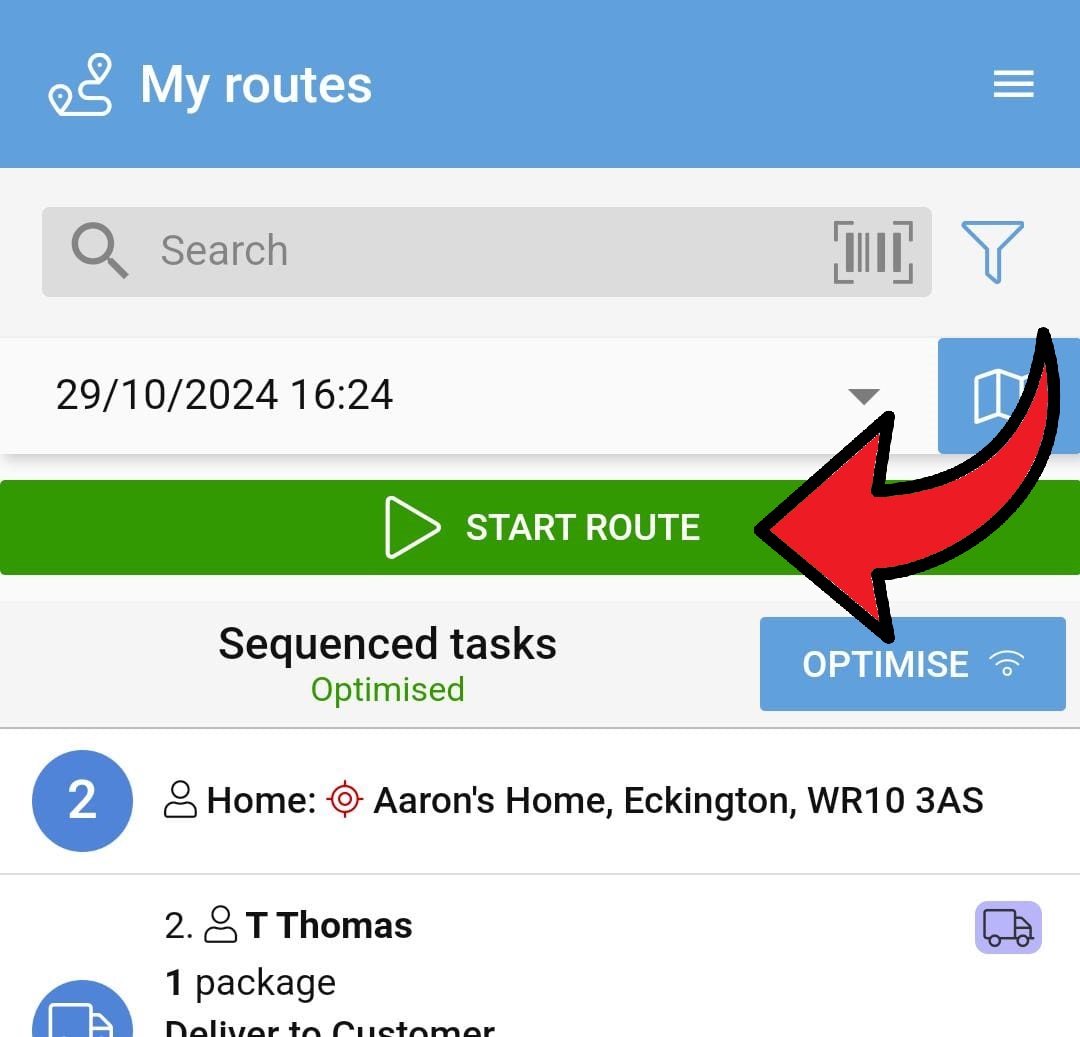
3. START ROUTE
Tap the green Start Route button to begin your deliveries.
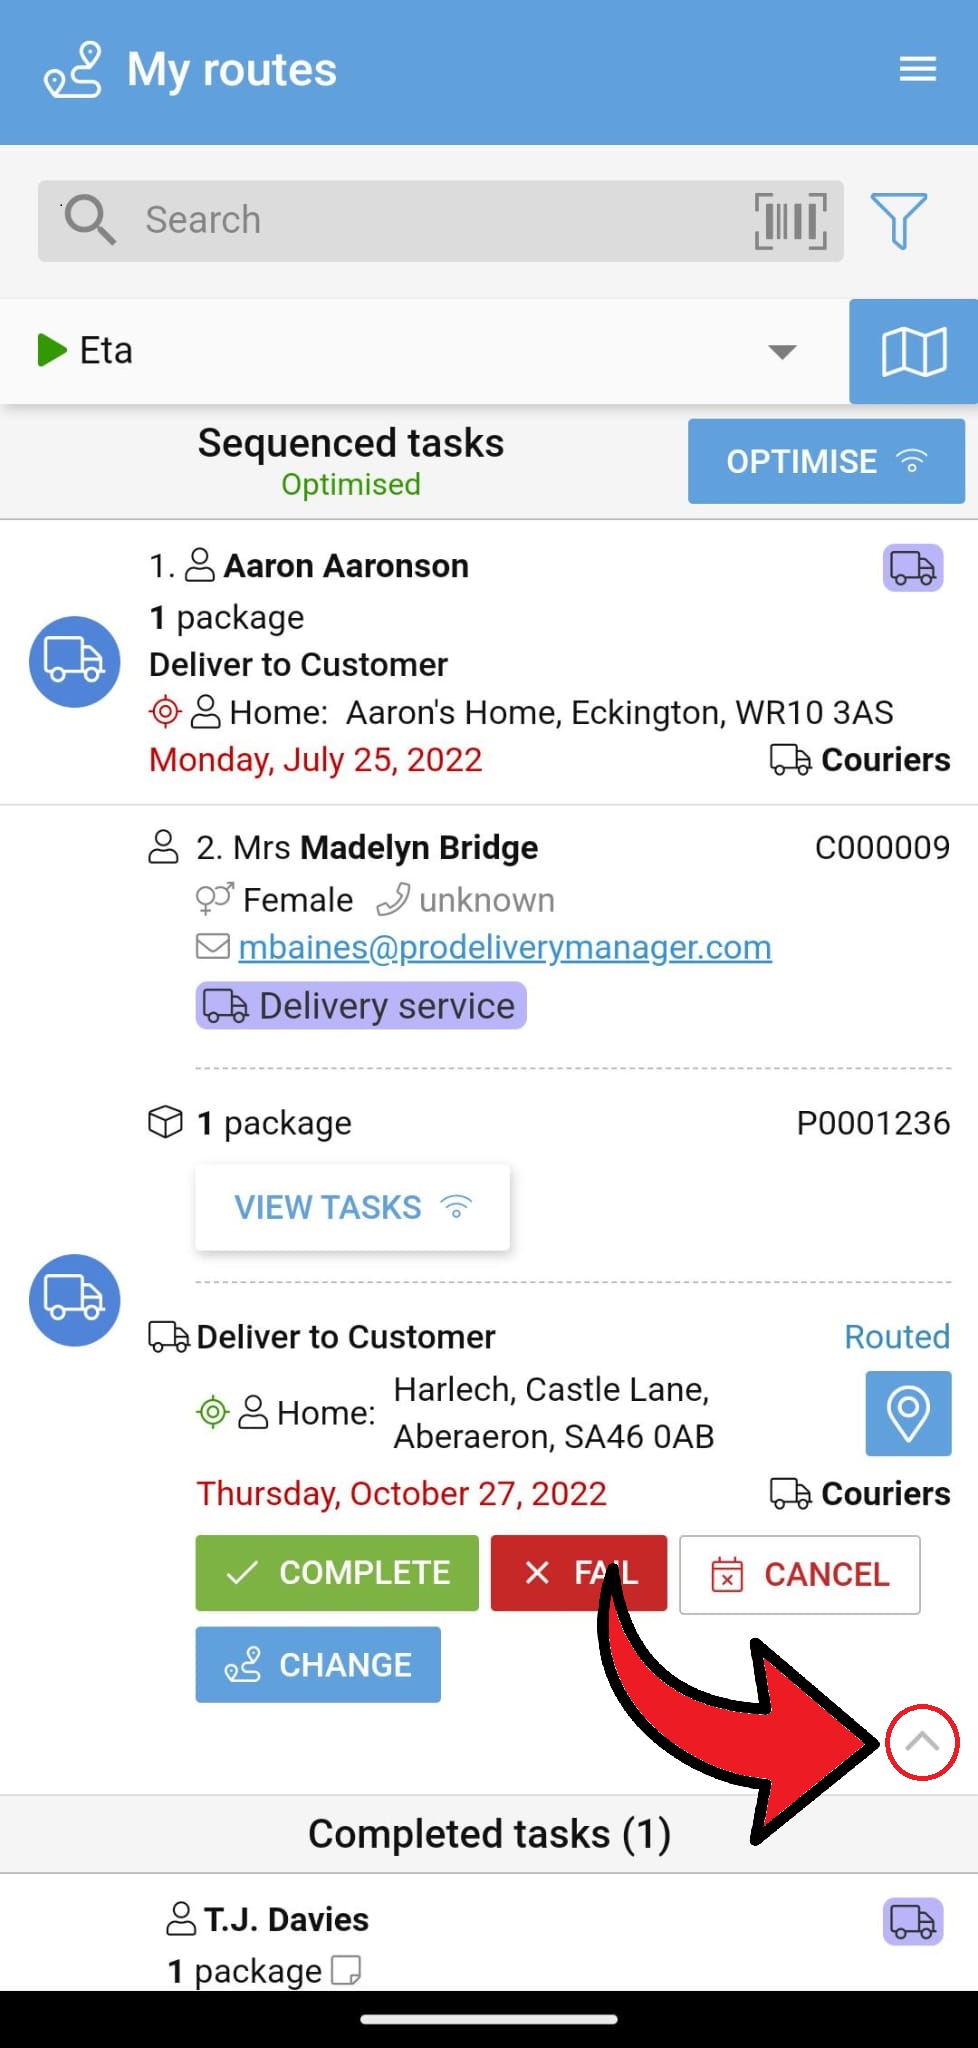
To view more details about the tasks on the route, just tap on them.
To close the detailed view, tap the ^ button at the bottom right of the panel.
4. Getting directions to a delivery address
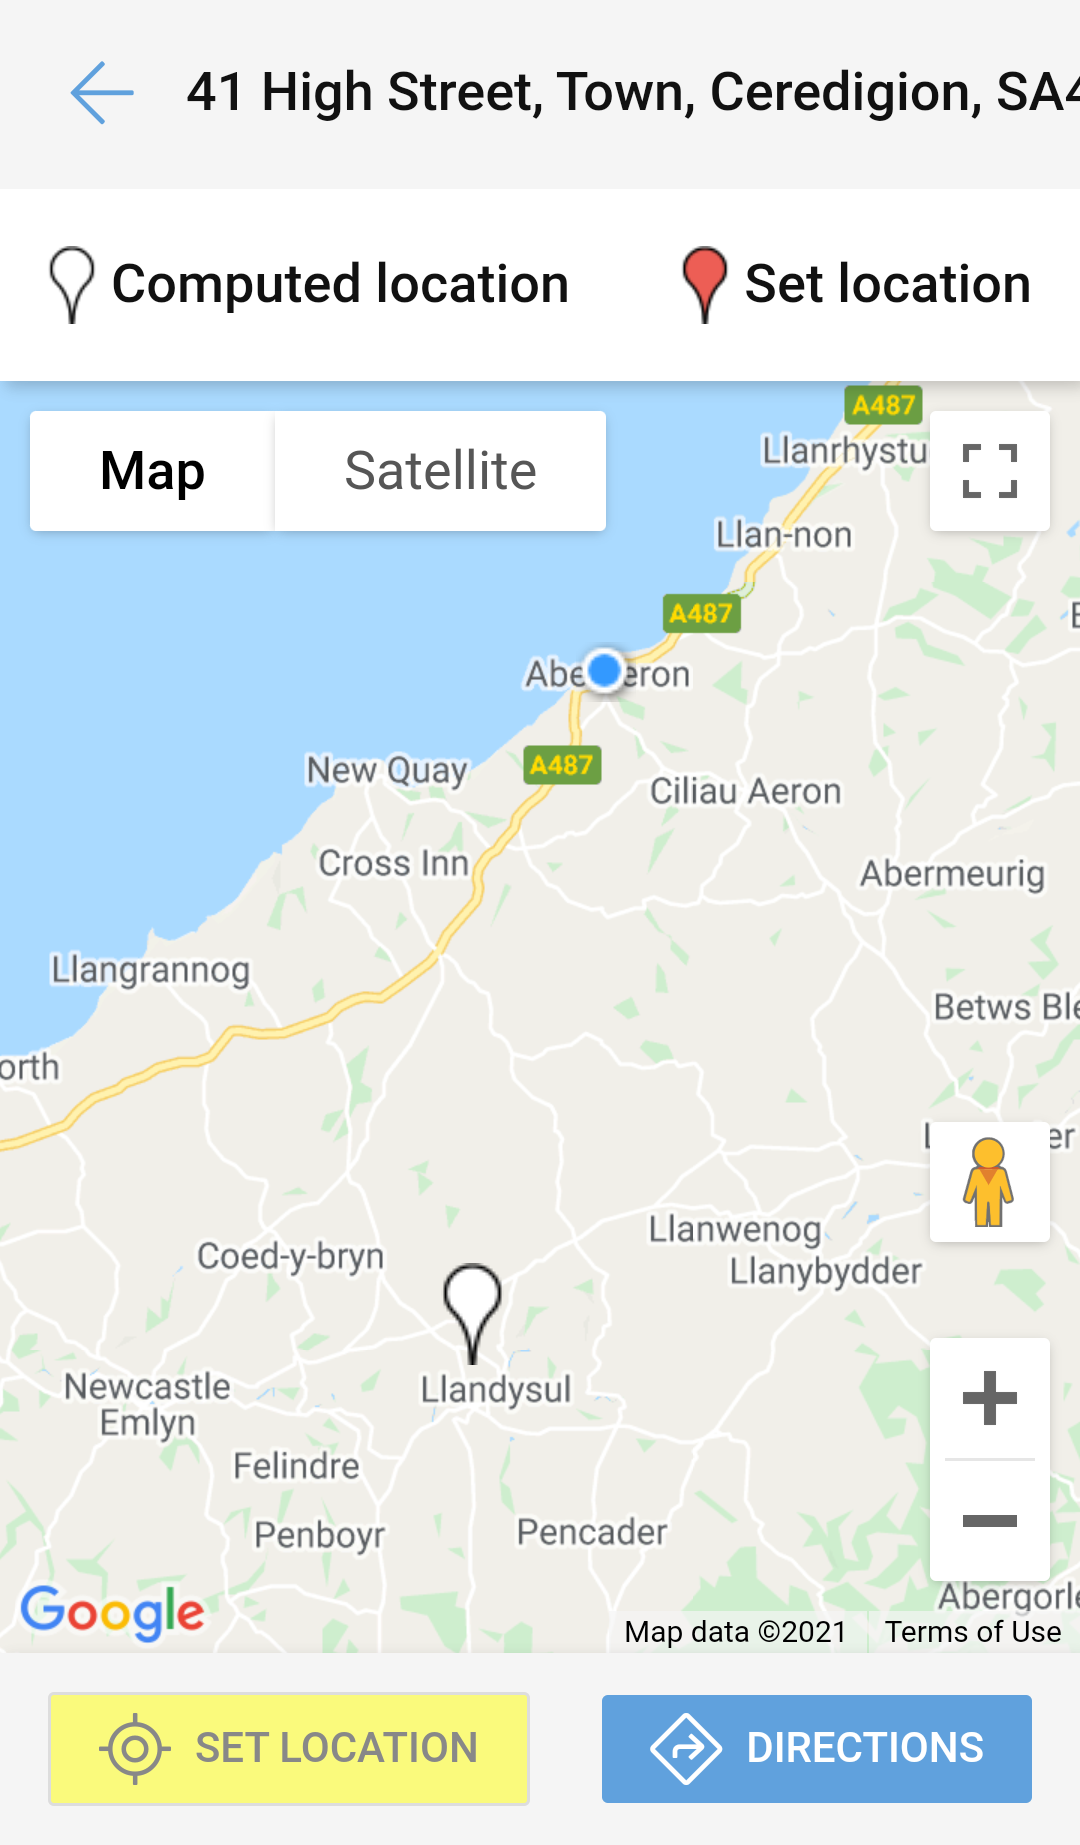
To get directions, simply select the task on the map, tap the pin icon  next to the location within the task and select DIRECTIONS.
Open the directions in the navigation app of your choice.
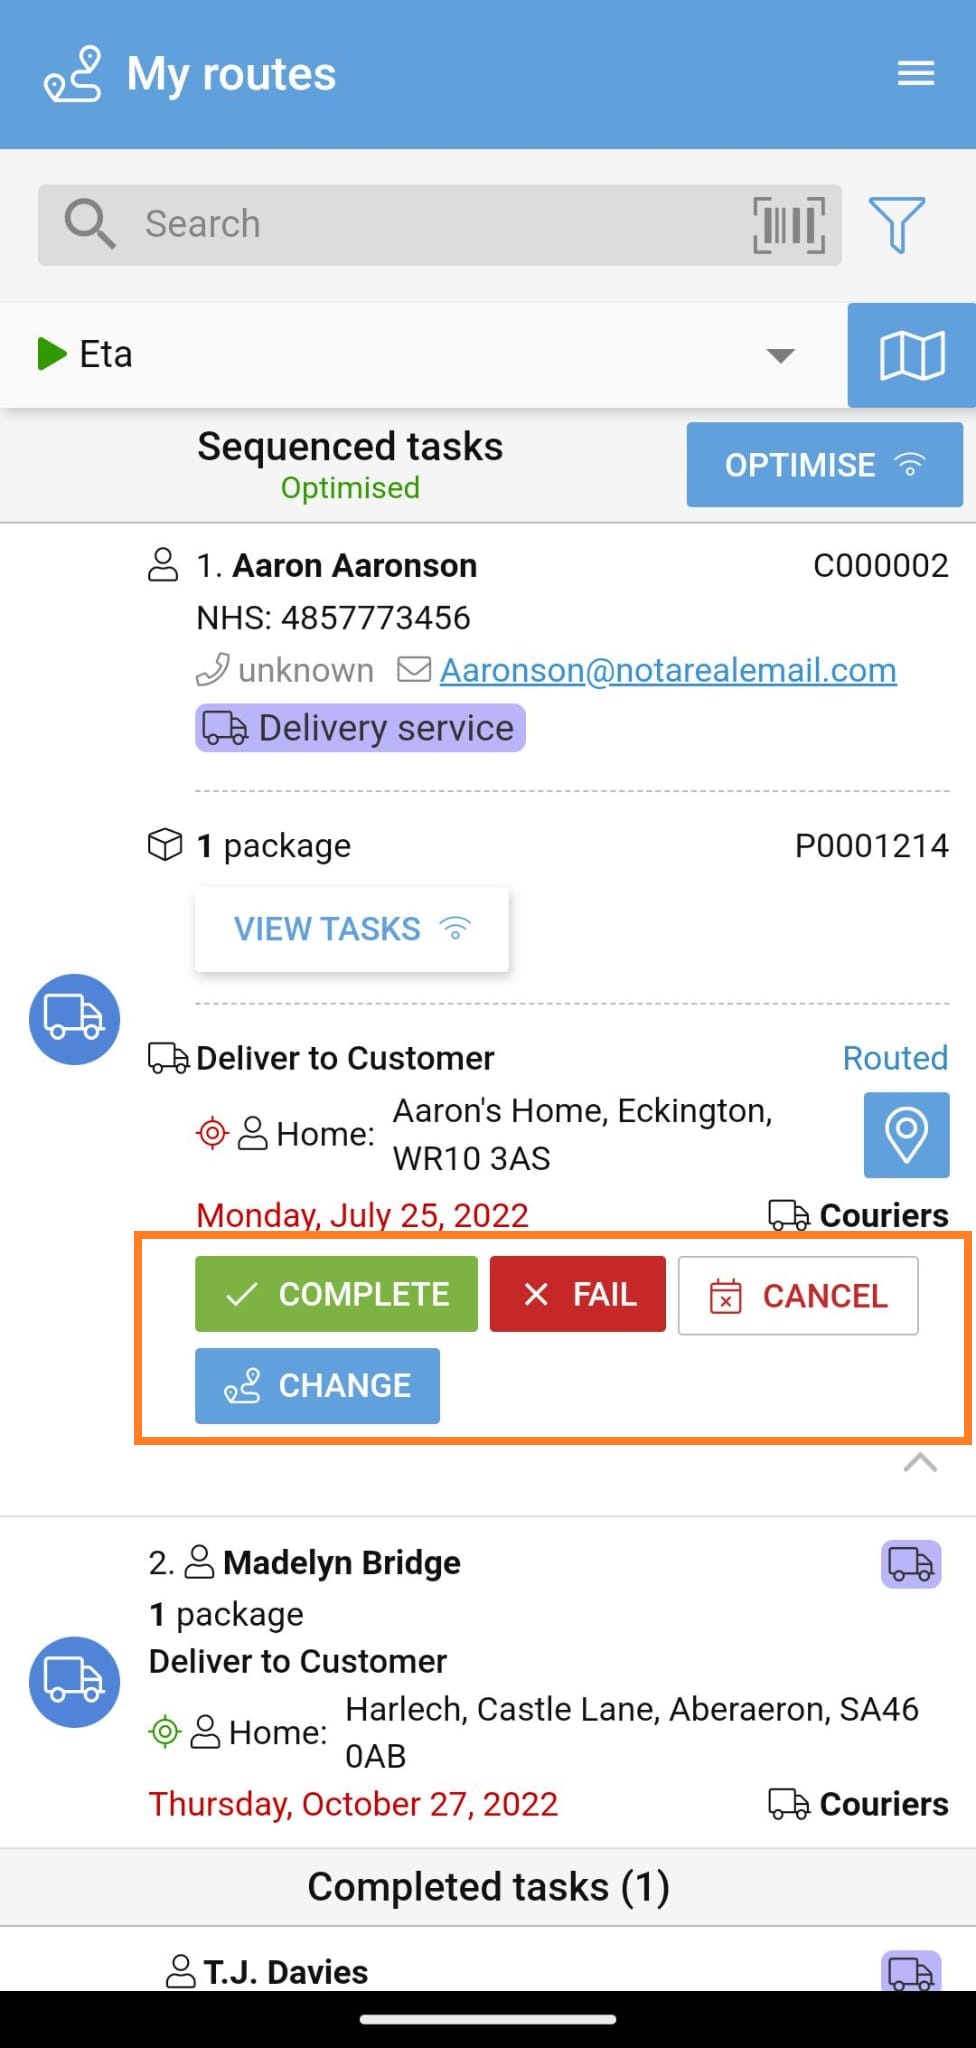
5. Updating task status: Completed, Failed or Cancelled
Along with all the task, order and customer information, you can mark the task as Completed, Failed, or Cancelled here.
Tap CHANGE to move the task to another route or remove it from the route altogether.
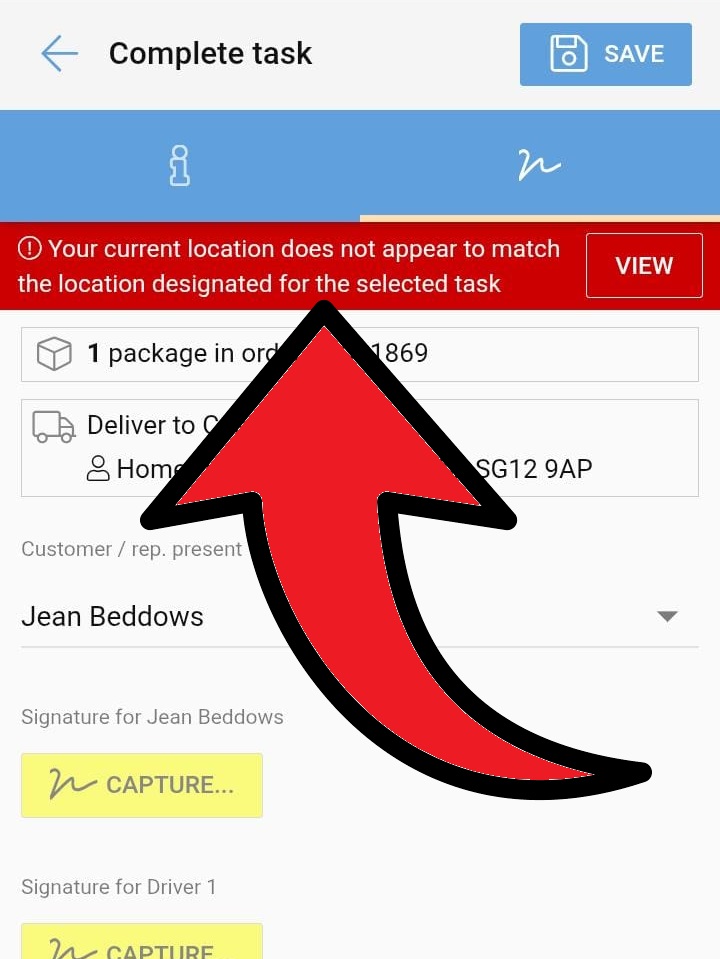
Location-based check at point of delivery
If the driver's GPS location does not match the location for the task, a warning will be shown on the screen at the point of updating the task status:
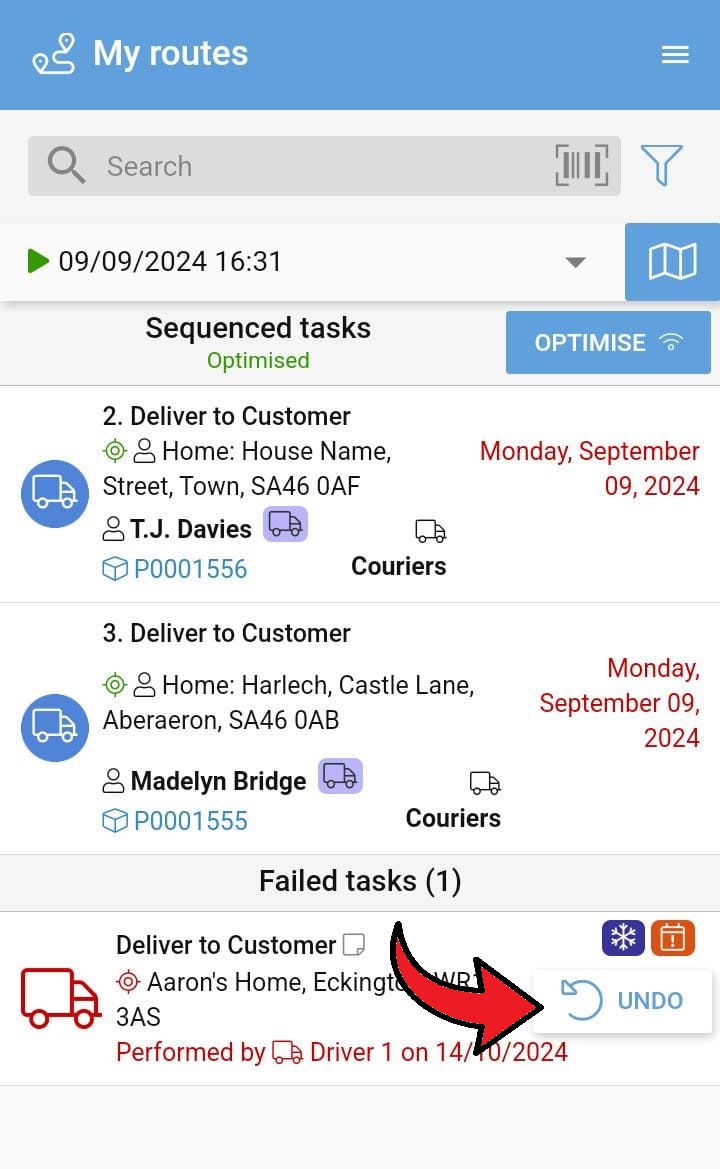
6. Undoing Tasks
To undo a task outcome, simply tap the Undo button that will appear once a task has been marked as Completed, Failed or Cancelled.
Please note: an internet connection is required to Undo tasks.
This feature is useful if, for example, a driver attempts to make a delivery but there is no answer at the door, so they fail the task. However, if the recipient then comes to the door, the driver can simply undo the Failed task and mark it as Completed instead.
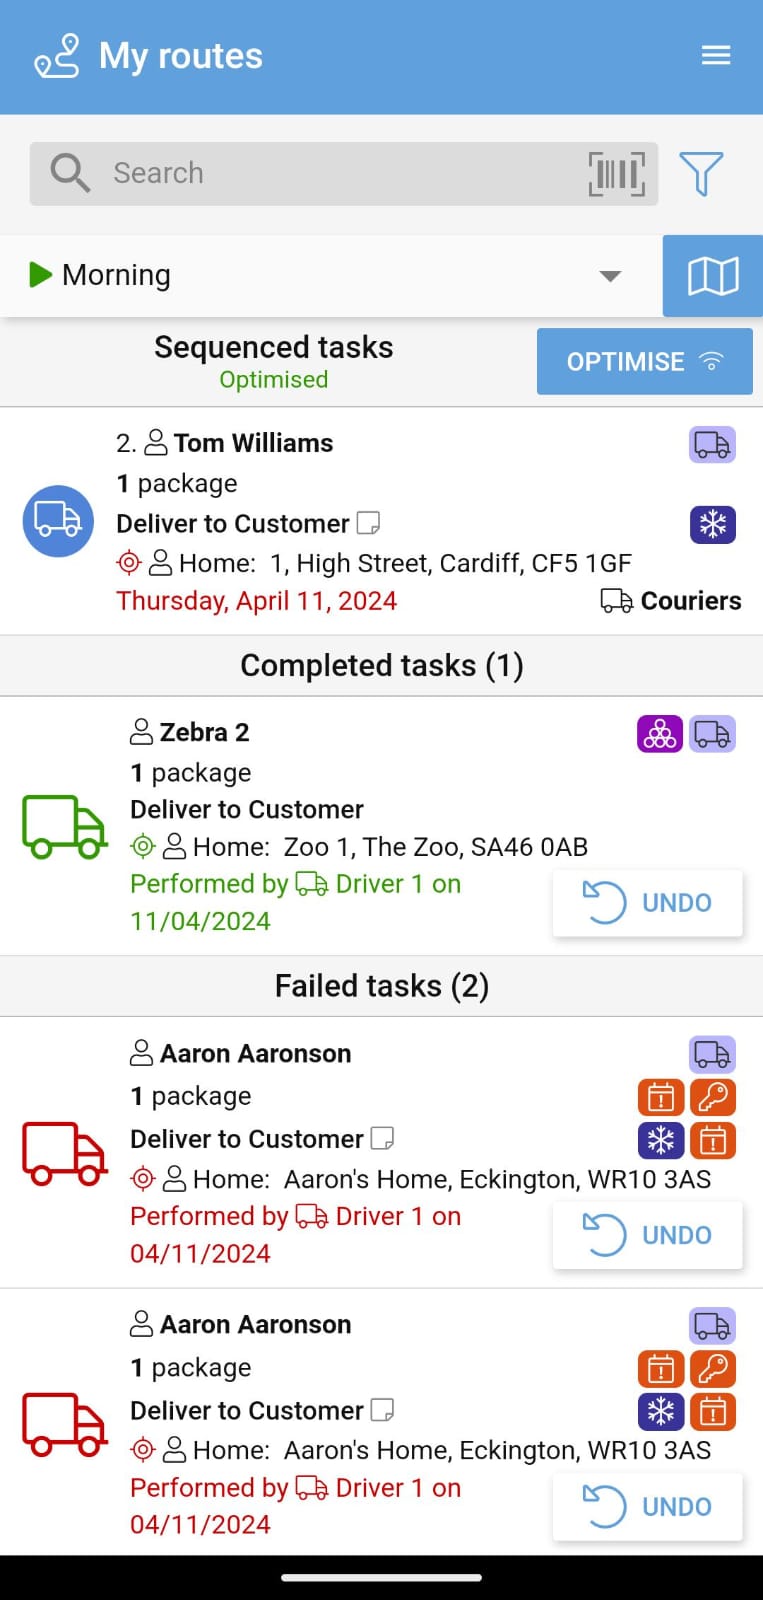
The Undo button will be present while the Route is active. As soon as the route is ended, it is no longer possible to undo a task outcome.
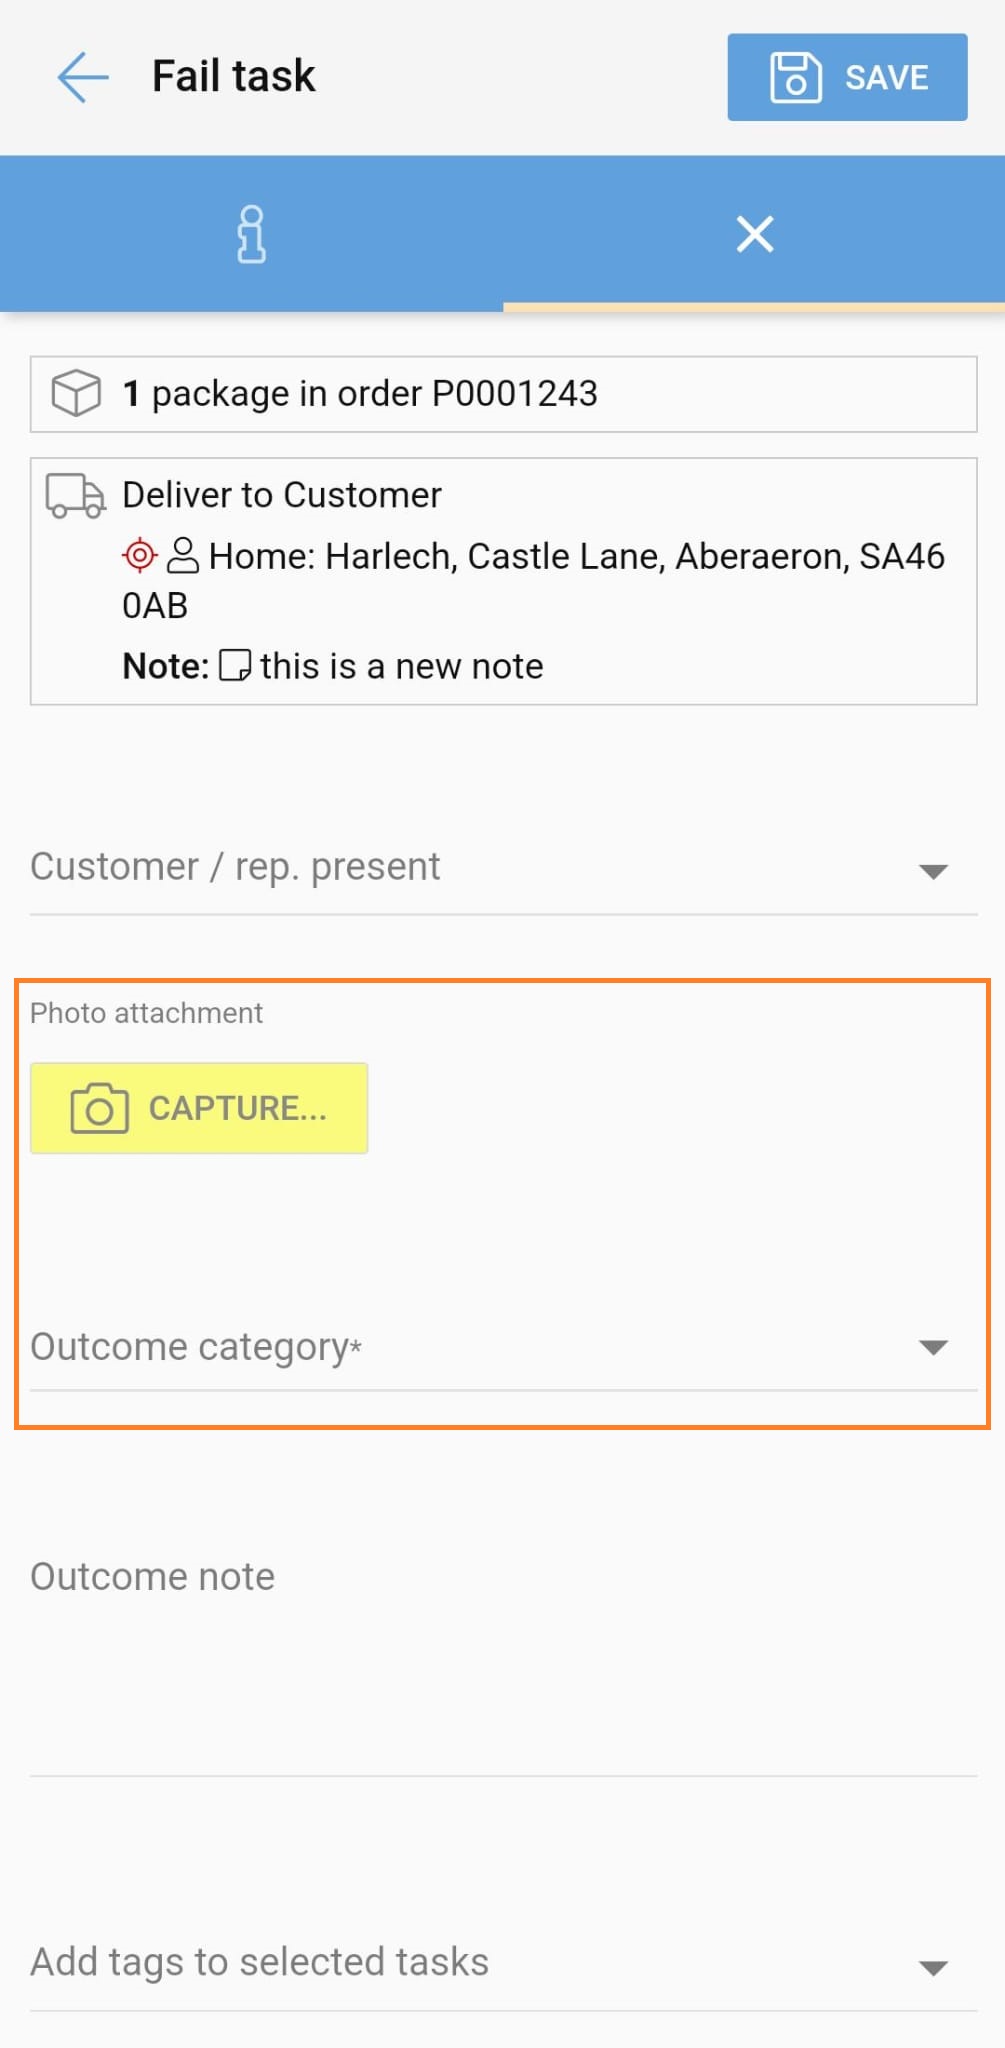
Taking signatures and adding photo attachments
Within the Completion screen there are options for the driver to take a signature or take a photo. This is useful if the driver has to leave the parcel in a safe place, or if an item needs a signature for proof of delivery.

To take a signature, simply tap the CAPTURE... button underneath either of the signature headings (customer or PDM user) and write on the screen. Click Save to save the signature.
To take a photo, tap the CAPTURE... button underneath the 'Photo attachment' heading.
The photo attachment feature is also available in the Fail and Cancel task screens, along with a drop down menu to record the reason for the failure/cancellation.
7. Finish Route
Once the route is completed (all tasks have been attempted), make sure to tap the red FINISH ROUTE NOW button that now appears at the bottom of the screen.
This will close the route, provide updated delivery times to the branch/managers, and stop created routes piling up in the drop-down menu.