 Watch the Video
Event Notifications
PDM Web can automatically notify designated people of certain events. These notifications can be configured from the Administration menu, under Event notifications.

There are a number of active event notifications already in place for new users which are set to notify customers of any changes to their order via email. Notifications can cover a wide variety of order and task events, be sent via email and/or SMS, and can be sent to customer contacts, PDM users, entities or a custom recipient.
To see what the notification message looks like, click on the + symbol next to the event.

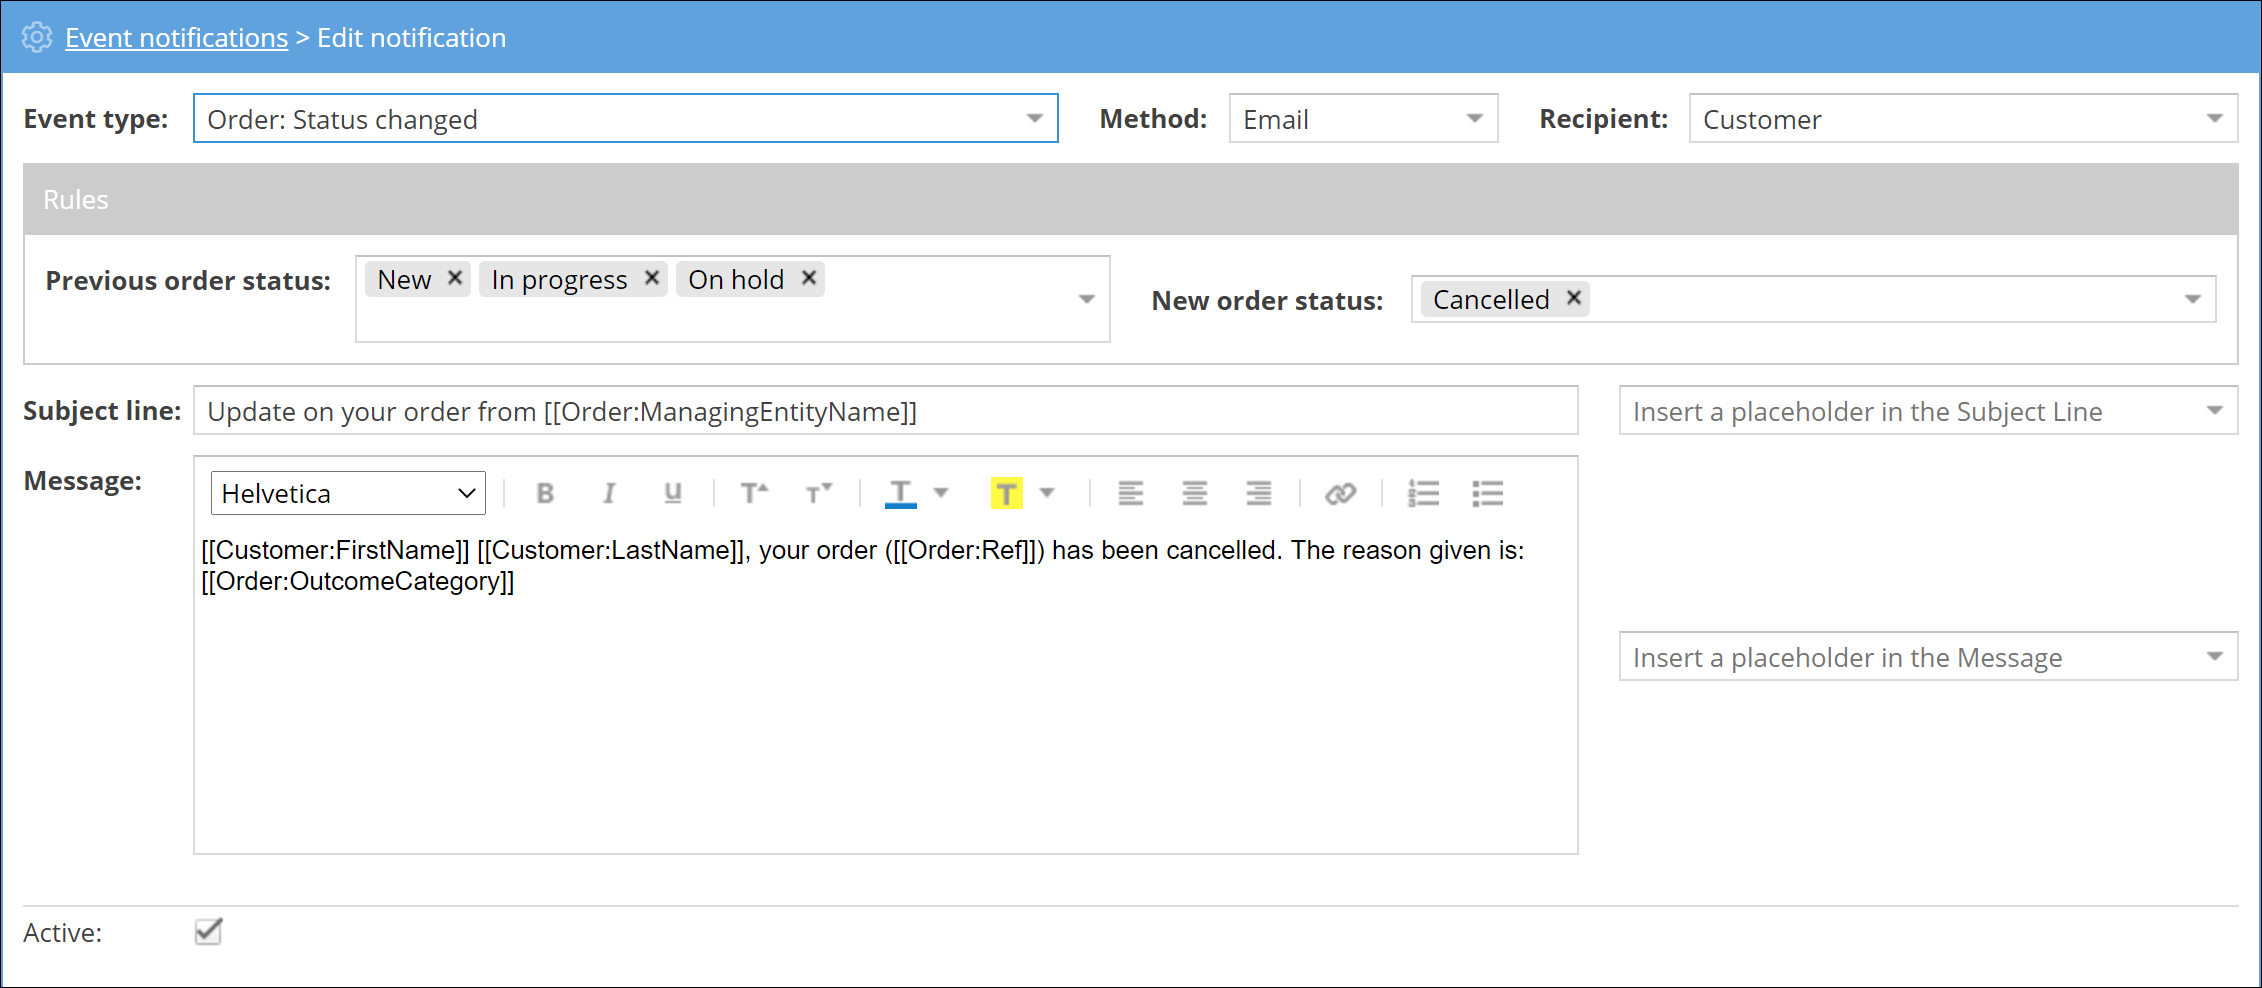
Any words in [[square brackets]] are placeholder text and will be replaced with the specific details for that event.
Creating and modifying event notifications
To create a new event notification, click on the yellow + New event notification button.

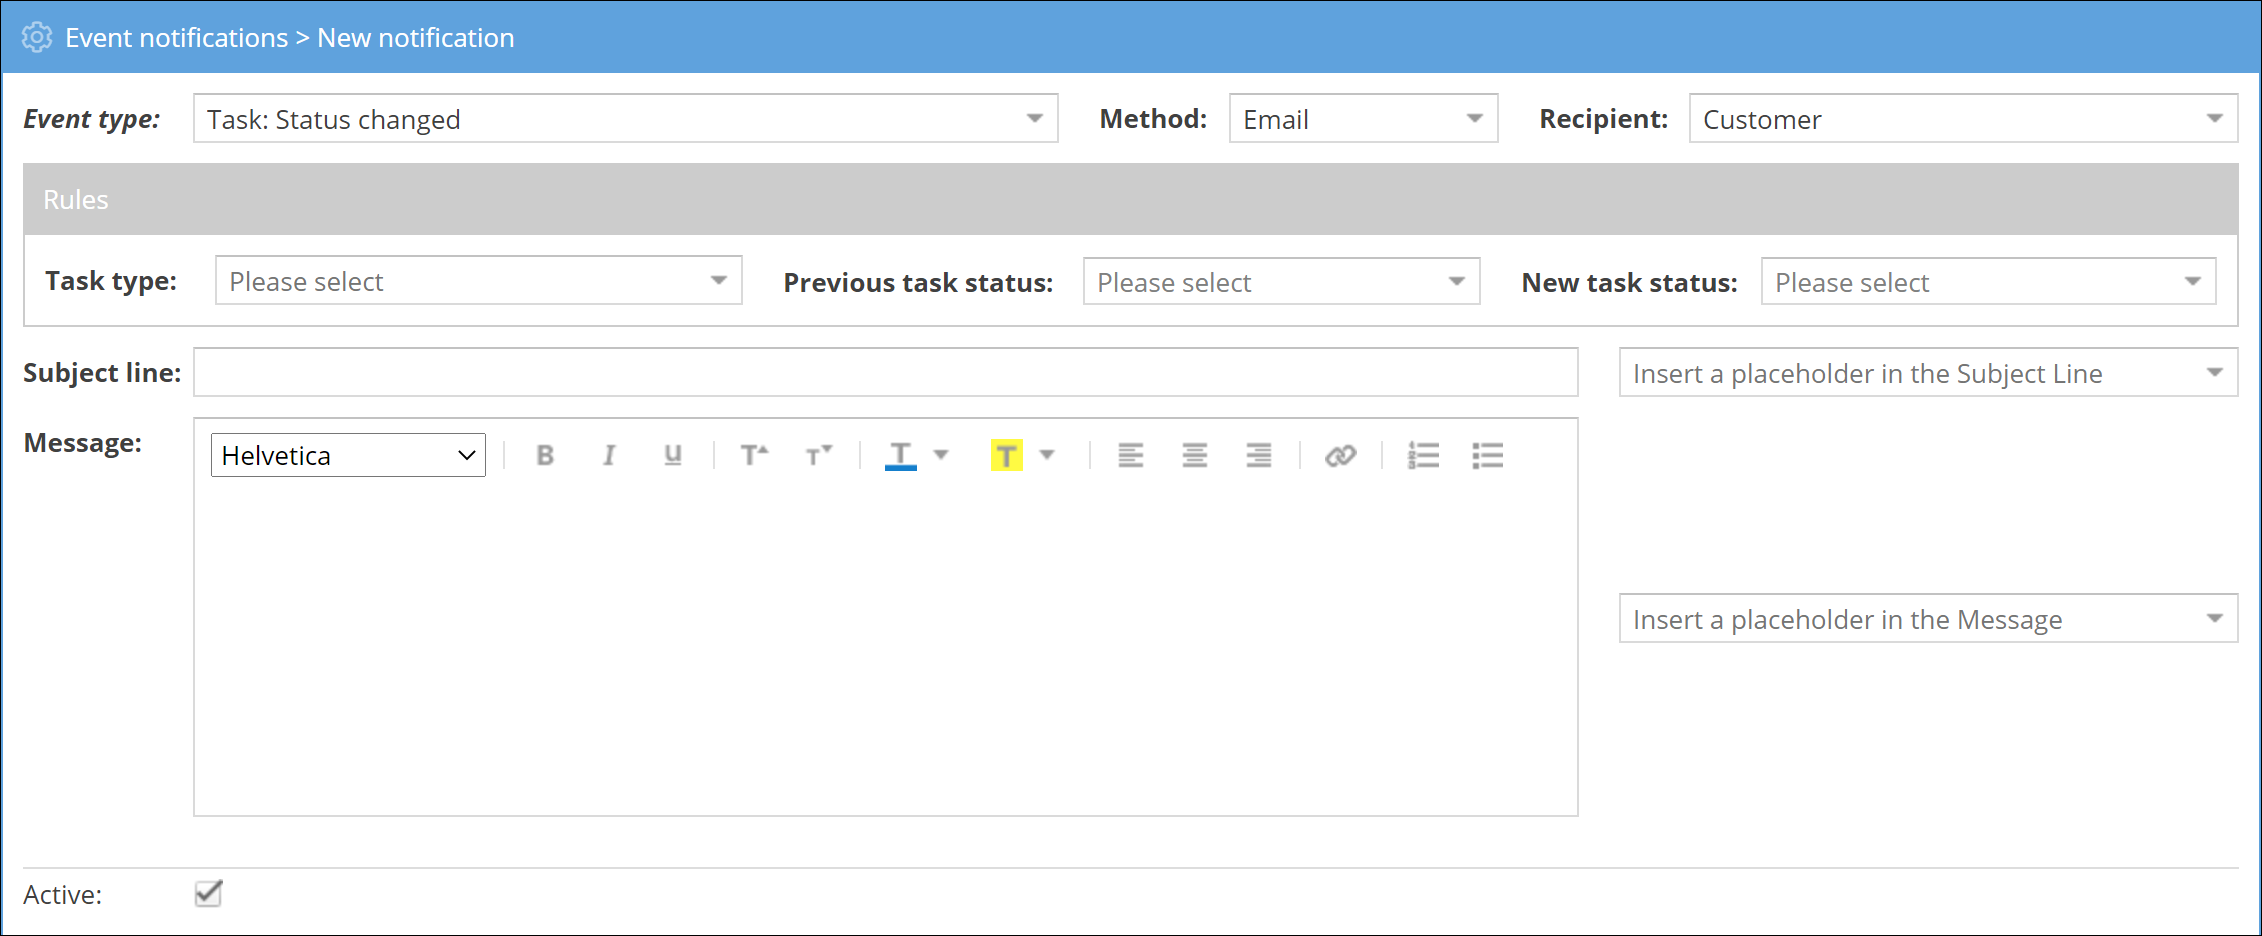
For each event notification, users have to select the following:
- Event type
- Order: Status changed
- Task: Status changed
- Task: Assigned user changed
- Task: Target date/time changed
- Method
- SMS
- Recipient
Note: these options will vary, depending on the event type. For example, if ‘Task: Target date/time changed’ is chosen the following options will be shown:- Customer
- Customer secondary contacts
- Assigned PDM users
- Order managing entity
- Task location entity
- Custom
Once the event type has been selected, it's time to set up the rules that trigger the event.

For example, if you want to send an event notification for an order status change, you'll be asked to choose the previous order status and the new order status. If you want to send an event notification when the user assigned to a task changes, you'll be asked to choose the task type and status. Required fields are in bold text.
Once you've selected the event type and chosen the rules for the notification, you can write your notification text. Choose a relevant subject line and write a clear message describing the event. You can use the ‘Insert a placeholder in the Subject line’ or ‘Insert a placeholder in the message’ drop-down menus to include specific event details into the subject line and/or message.
To save your new event notification, click Save. Alternatively, you can Cancel your new notification. If you would like to disable it, untick the ‘Active’ checkbox to deactivate it.

To edit an existing notification, either double-click on it from the Event notifications window or right-click and click on View/edit event notification.
Once you’ve made all the required changes, make sure to Save your changes.
If you don’t wish to save your changes click: Cancel Changes.
You can disable an event notification by unticking the ‘Active’ checkbox to deactivate it.
If the event notification is no longer required, you can also permanently delete it by clicking: Delete.
For more information on viewing sent or pending notifications, see the Managing Communications tutorial.


