 Watch the Video
Creating Customers
The Customers module, accessible from the main menu, allows you to create and manage any customers.
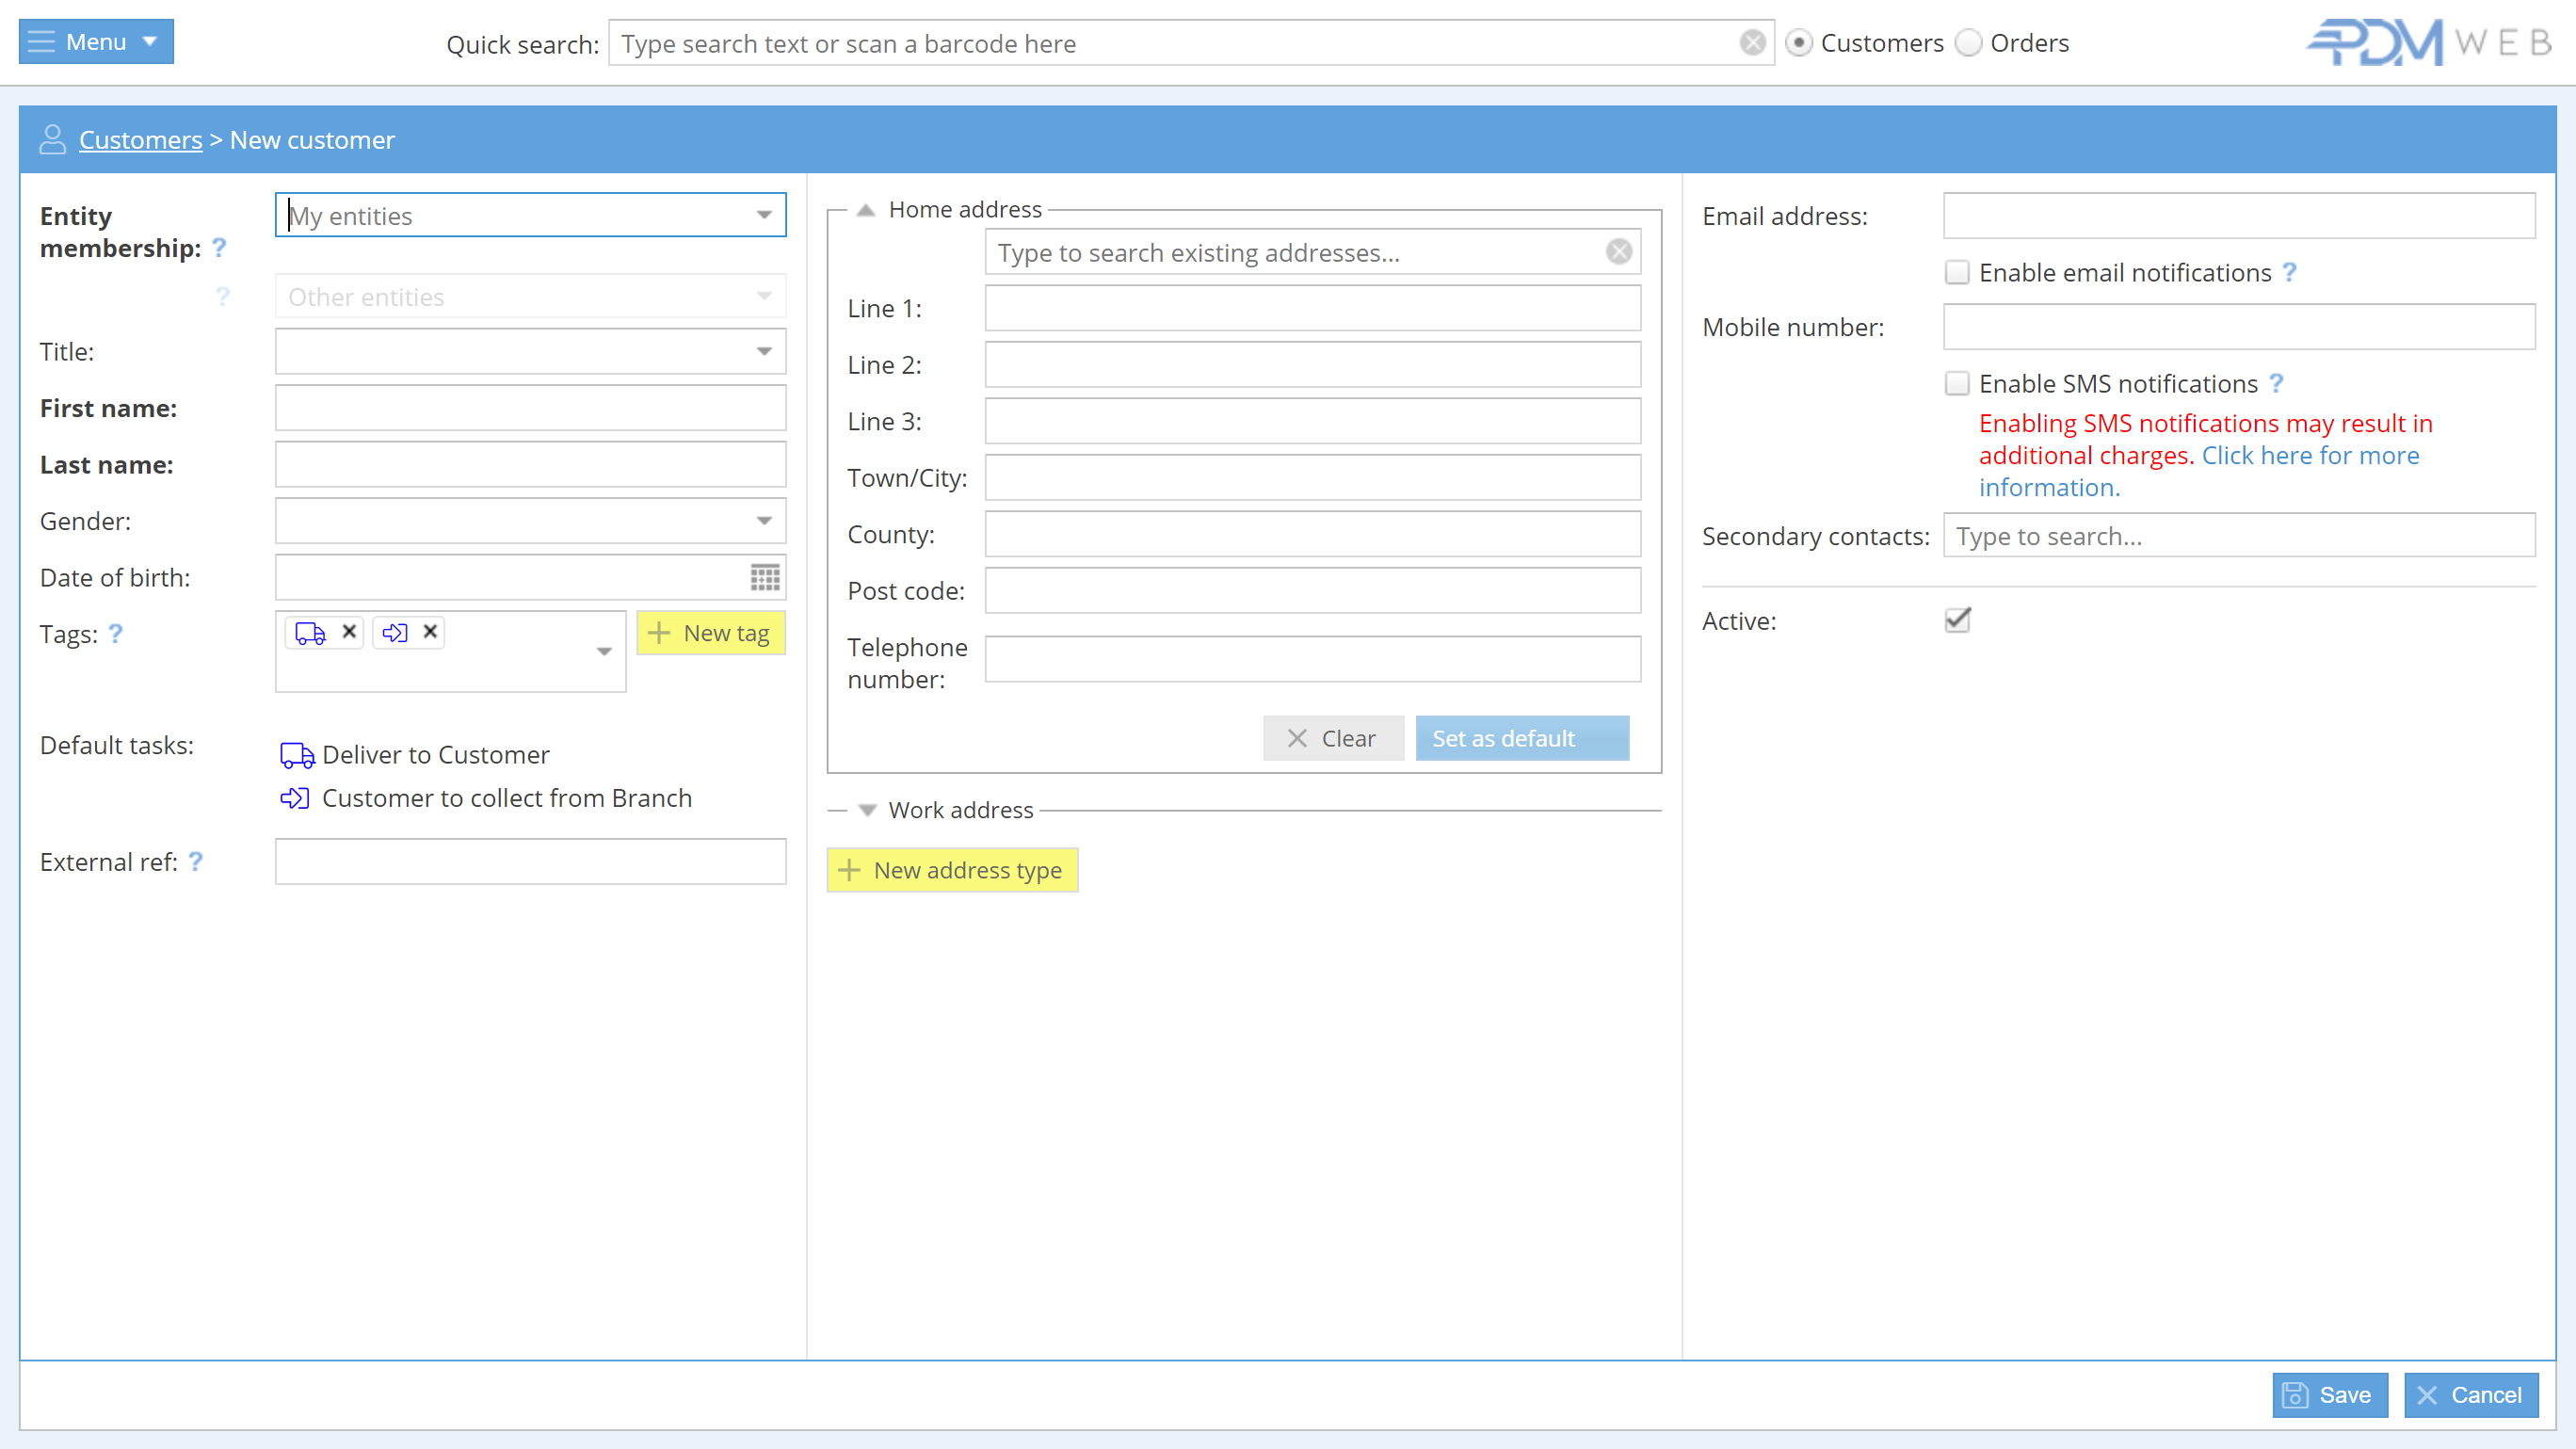
When you first open the section you’ll see a summary of any existing customers, and have the option to create new customers. To create a new customer, click on the yellow + New Customer button in the top right corner of the screen. This will bring you to the New Customer form.

The required fields are in bold text: Entity membership, First name, and Last name. You’ll also have to have filled in at least one address. If you want to send the customer notifications by email or SMS, you’ll also need to include a valid email address and/or mobile number.
Note: As you’ll need to specify the entity membership for any new customers, it’s a good idea to have planned out and created any necessary entities before you start adding new customers.
When choosing an entity membership for the customer, you’ll only be able to choose entities you are also a member of. However, you also have the option of choosing additional entities, ones which you aren’t a member of, depending on your user permissions. This is useful if other entity users will need to see or access the customer’s information. For example, if the customer uses your branch but also uses another branch, you can give the other branch access by naming them as an Additional Entity, even if you aren’t a member.
You can also include tags, a great way to include additional information and create default actions for the customer. For example, if the customer is hard of hearing, or has a dog with a taste for delivery drivers, you can record that as a tag. The 'Delivery service' and 'Customer collects' tags are included by default, which automatically assigns the relevant task to all orders relating to this customer.
Any additional information you include will also be available when creating orders for that customer.
You can also select a secondary contact from existing customers, giving you the option of sending event notifications to the secondary contact. They will also be listed in the contact names field when completing tasks that don’t have to be completed specifically by the customer.
Once you’ve recorded all the necessary information, click on Save to create the customer and be taken to the customer information screen, showing a summary of the customer’s details and orders.
If you are ready to place an order, go ahead and click the + New Order button. If you want to create another customer, return to the Customer module from the main menu.


